
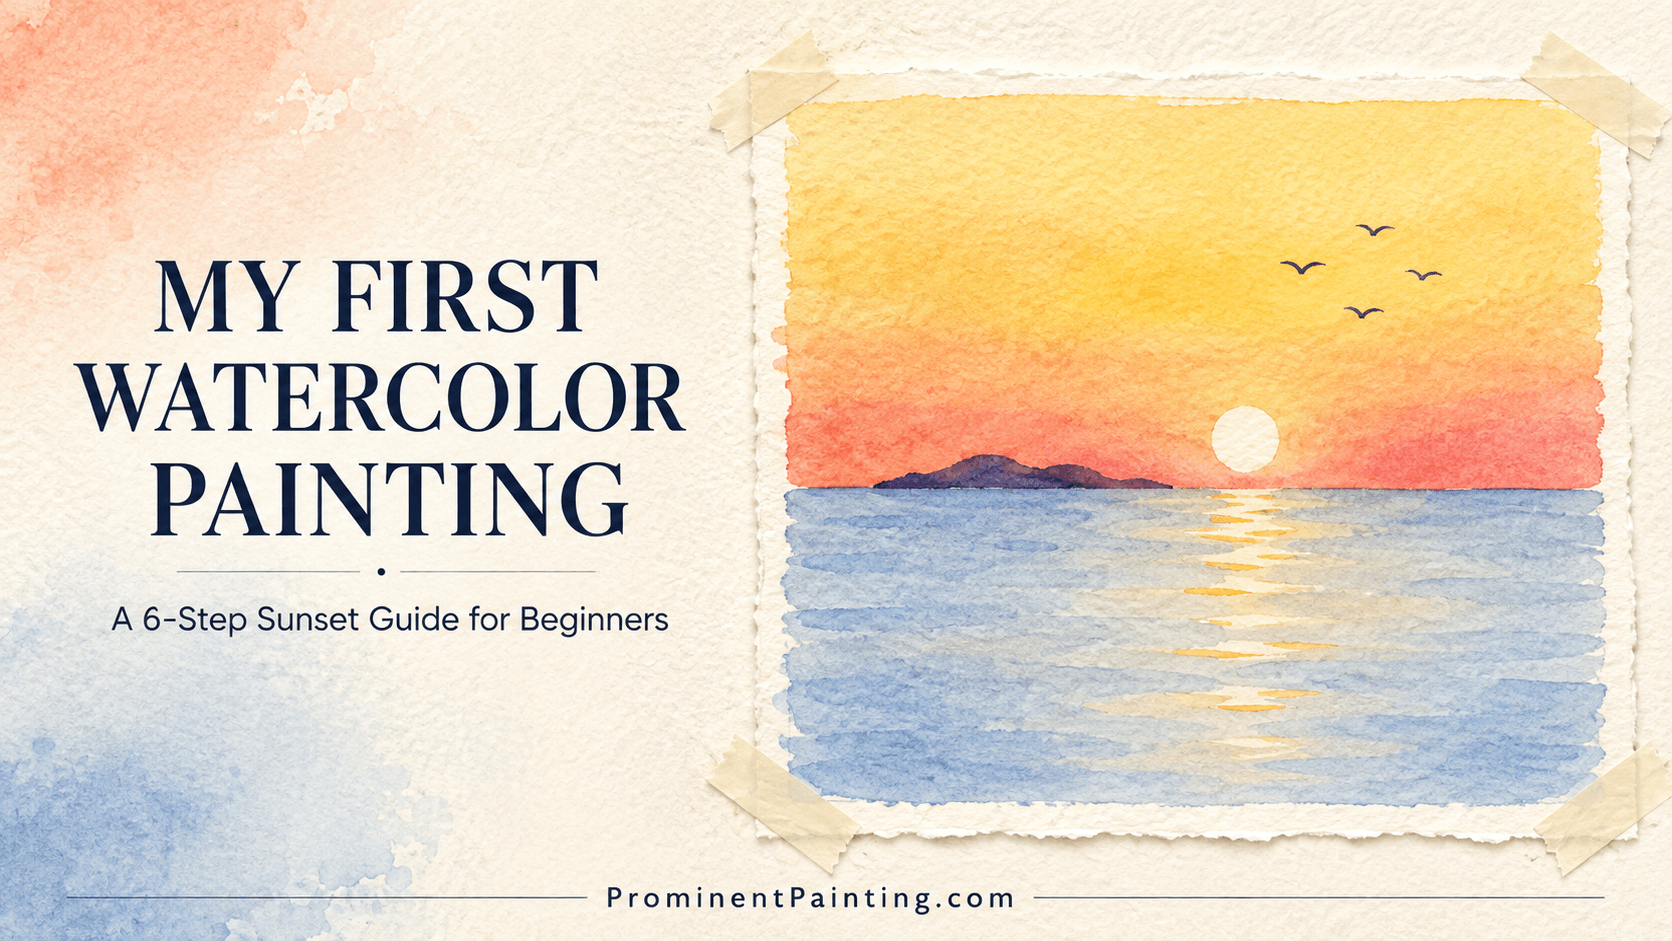
Summary: Learn how to create your very first watercolor painting with an easy, six-step sunset seascape. You only need three primary colors, one round brush, and heavy paper. This complete guide walks through setting your horizon, laying clean washes, capturing warm light reflections, and avoiding muddy mistakes.
Staring at a blank sheet of cold-press paper feels intimidating when you have never picked up a brush. You worry about using too much water, making muddy colors, or ruining expensive supplies before you even start.
Here is the secret: watercolor does not have to be complicated. With just three basic colors and a single brush, you can paint a glowing coastal sunset in under thirty minutes.
Let us break down the exact process so you can finish your first painting today with confidence.
What Supplies Do You Need for Your First Watercolor Painting?
To complete your first watercolor painting, you need three basic colors (warm yellow, warm red or pink, and cobalt or ultramarine blue), one medium round brush (size 6 or 8), cold-press watercolor paper rated at 300 GSM (140 lb), two jars of water, and paper towels.
You do not need a massive 48-pan palette to start. In fact, limiting your supplies helps you focus on brush control and water flow instead of getting overwhelmed by color choices.
- Paper: Choose heavy watercolor paper pads rated at 300 GSM (140 lb). Lightweight paper will buckle and warp as soon as water touches it.
- Paint: A minimal palette of yellow, red/rose, and blue. Practicing with a limited palette keeps your washes clean and prevents accidental mud.
- Brush: One medium synthetic round brush (size 6 or 8) with a fine tip.
- Setup: Two water jars (one to clean pigment, one for fresh water) and a pencil.
| Supply | Recommended Spec | Beginner Purpose |
| Watercolor Paper | 100% Cotton or Wood Pulp (300 GSM / 140 lb) | Prevents warping and absorbs washes evenly |
| Round Brush | Size 6 or Size 8 Synthetic | Handles large washes and fine line details |
| Pigments | Yellow, Magenta/Pink, Ultramarine Blue | Blends warm skies and cool water naturally |
| Water Jars | Two clean glass or plastic containers | Keeps clean rinsing separate from dirty washes |

Step 1: Mark the Horizon and Sun
Begin by lightly drawing a straight horizontal line across the lower third of your paper using a pencil. Next, sketch a faint circle just above the center of this line to mark the sun.
Keep your pencil pressure very light. Dark graphite lines show right through transparent watercolor washes and cannot be easily erased once paint dries over them.
Placing your horizon line in the lower third rather than dead-center creates a balanced composition that gives your sky room to breathe.
Step 2: How Do You Paint a Smooth Watercolor Sky Wash?
To paint a smooth sky, apply a wet-on-wet wash starting with dilute yellow at the horizon, blending upward into soft pink near the top, while carefully painting around the pencil circle to preserve the raw white paper for the sun.
Load your round brush with clean water and dilute yellow paint. Lay a horizontal stroke across the horizon, leaving the sun circle untouched.
Quickly blend a soft pink or warm red into the upper sky while the paper is still wet. Letting the wet edges bleed together on the page creates a natural gradient without harsh brush marks. Once the sky is filled, pause and let the paper dry completely.
Step 3: Add the Water Wash
Once your sky wash is bone dry, mix a pale pool of blue paint with plenty of water. Paint smooth, horizontal strokes across the bottom half of the paper, working from the horizon down to the bottom edge.
Painting water under a dry sky prevents your blue wash from bleeding upward into the warm yellow horizon. If you want to understand how fluid ratios affect pigment movement, review basic wet-on-wet watercolor techniques before laying your wash.
Keep the strokes fluid and light. The white of the paper beneath gives watercolor its signature luminosity.
Step 4: Paint the Distant Land Silhouette
Mix your blue pigment with a tiny touch of red and yellow to create a dark, muted neutral tone. Using the tip of your brush, paint a low, sloping landmass sitting directly on the right side of the horizon line.
Atmospheric perspective means objects far away look simpler and darker against a glowing sunset. Keep the land silhouette relatively small so it does not overpower the water.
Step 5: How Do You Create Sunlight Reflections on Water?
To paint sunlight reflections, use the tip of your brush to lay short, horizontal dashes of warm yellow across the blue water directly beneath the sun, making strokes wider near the bottom and tighter near the horizon.
Wait until the blue water wash is slightly damp or dry before adding reflection strokes. If the paper is soaking wet, the yellow paint will simply spread out and turn green against the blue base.
Keep your brush strokes loose and broken. These gaps allow the cool water below to show through, which simulates the shimmer of moving waves.
Step 6: Finish with Fine Details
Bring the seascape together by painting tiny ripples and distant flying birds using a concentrated mix of dark blue paint.
- Use the very tip of your round brush to paint thin, dark ripple lines near the foreground.
- Paint two or three tiny “V” shapes in the open sky above the land to suggest soaring seabirds.
- Step back from your desk and let the painting dry flat to prevent puddling.
Learning basic brush control on simple elements makes jumping into larger projects like easy watercolor flowers or landscapes much easier down the road.
What Common Watercolor Mistakes Should Beginners Avoid?
The most common watercolor mistakes include using too much water on dry paper, scrubbing delicate paper with stiff brushes, using thin printer paper, and layering wet paint over wet washes before they have dried.
- Puddle Flooding: Using dripping-wet brushes causes backruns (also known as cauliflowers or blossoms). Dab excess water onto a paper towel before touching the page.
- Scrubbing: Working over the same damp area repeatedly tears the paper fibers and lifts underlying color.
- Skipping Drying Time: Applying blue water strokes directly against a wet yellow sky turns your entire horizon bright green.
- Color Overmixing: Blending all three primary colors together too aggressively on the paper produces dull gray mud instead of crisp reflections. For a deeper breakdown on handling unexpected bloopers, see our guide on how to fix watercolor mistakes.
FAQs: My First Watercolor Painting
Why did my watercolor sky turn muddy?
Muddy watercolor washes happen when complementary colors mix together while wet, or when you overwork damp paper with too many brush passes. In a sunset, keep your yellow and blue washes physically separated by a dry boundary or a pink transition tone to keep colors bright.
Do I need to stretch watercolor paper before painting?
For small beginner studies on heavy 300 GSM (140 lb) paper, you do not need to pre-stretch your paper. Simply taping the four edges of your sheet to a flat board with painter’s tape will keep it flat during light washes.
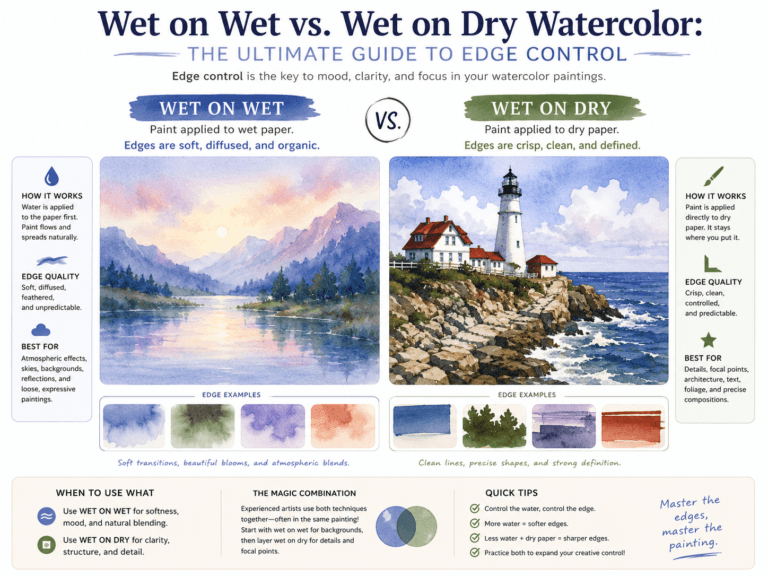
What is the difference between wet-on-wet and wet-on-dry techniques?
Wet-on-wet involves applying wet paint onto dampened paper, which creates soft, diffused edges ideal for skies and mist. Wet-on-dry means painting wet pigment onto completely dry paper, producing sharp, well-defined shapes like silhouettes and distant ripples.
Can I use regular drawing paper for watercolors?
Standard drawing or printer paper cannot handle water. It pills, tears, and buckles instantly when wet. Always practice on dedicated watercolor paper rated at 300 GSM (140 lb) or higher.
How do I paint pure white highlights in watercolor?
Because traditional watercolor contains no opaque white ink, artists preserve white highlights by painting around the white paper or using removable masking fluid. You can also add opaque highlights afterward using white gouache.

Olly
Olly Farmer M.Sc, B.Sc, PGCE 25 years experience of Watercolor Painting and AI Art; teacher for 13 years; Creator of Art Tools; Art Gallery Contributor of Art Articles to Medium.com, LinkedIn and Facebook
Continue exploring

PROMINENT PAINTING
Keep your creative momentum
Get new painting guides, practical techniques and artist stories delivered without the noise.
Occasional emails. Unsubscribe whenever you like.