Introduction
Welcome to our comprehensive guide on mastering watercolor brush strokes. In this article, we will delve into the world of watercolor painting techniques, focusing specifically on brush strokes and how they can enhance your artistic expression. Whether you’re a beginner or an experienced artist, understanding and refining your brush stroke techniques is essential for creating captivating watercolor artwork. Join us as we unlock the secrets behind mastering watercolor brush strokes, enabling you to unleash your full creative potential.
The Art of Watercolor Brush Strokes
Understanding the Fundamentals
Before we dive into the intricacies of watercolor brush strokes, it’s crucial to grasp the fundamental concepts that underpin this expressive art form. Watercolor painting relies on the delicate balance between water, pigment, and brush. Understanding how each component interacts will pave the way for mastering brush strokes.
Exploring Different Brush Types
Brushes come in a variety of shapes, sizes, and materials, each offering unique characteristics and possibilities. Let’s explore some commonly used brush types in watercolor painting:
- Round Brushes: Perfect for creating versatile lines, washes, and detailing.
- Flat Brushes: Ideal for covering large areas and achieving crisp edges.
- Fan Brushes: Excellent for creating textures and special effects.
- Rigger Brushes: Great for producing fine lines and intricate details.
- Mop Brushes: Well-suited for creating soft washes and blending colors.
Selecting the Right Brushes for Your Artistic Vision
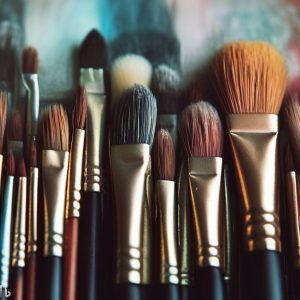
Choosing the appropriate brushes for your artwork depends on various factors, such as the desired effects, subject matter, and personal preference. Consider the following tips when selecting brushes:
- Match the brush size to the scale of your painting.
- Use synthetic brushes for crisp lines and synthetic blends for washes.
- Experiment with different brush shapes to expand your creative possibilities.
- Invest in high-quality brushes for better performance and durability.
Caring for Your Brushes: Maintenance and Cleaning Tips
Proper brush care is essential for maintaining their performance and prolonging their lifespan. Follow these tips to keep your brushes in optimal condition:
Cleaning Your Brushes: Best Practices and Techniques
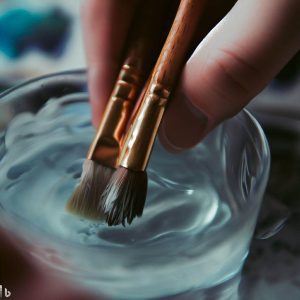
- Rinse your brushes thoroughly with clean water after each painting session.
- Use mild soap or brush cleaner for deep cleaning when necessary.
- Avoid using excessive force when cleaning to prevent damage to bristles.
- Reshape the bristles gently and let them air-dry completely before storing.
Proper Storage: Preserving the Shape and Integrity of Your Brushes
- Store your brushes horizontally or vertically in a clean and dry container.
- Avoid overcrowding brushes to prevent the deformation of bristles.
- Protect the brush tips by using protective caps or wrapping them in tissue paper.
- Keep brushes away from extreme temperatures and humidity to avoid damage.
Mastering Basic Watercolor Brush Strokes
Wash Technique: Creating Smooth and Gradual Color Transitions
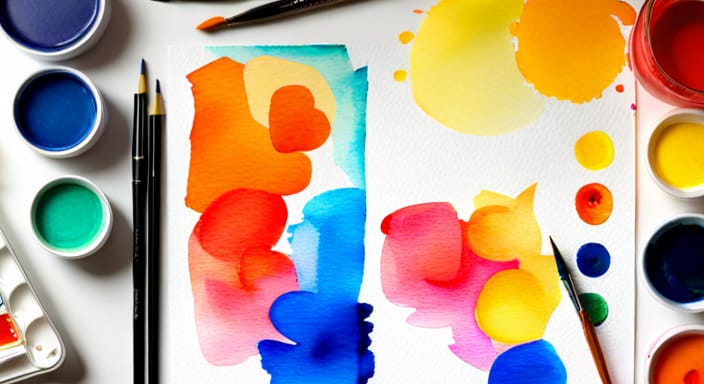
The wash technique is fundamental to watercolor painting, allowing you to achieve smooth and gradual color transitions. Follow these steps to master the wash technique:
- Wet the paper evenly with clean water using a large brush.
- Load your brush with diluted pigment and apply it to the wet surface.
- Tilt the paper to guide the flow of the pigment and create a smooth transition.
- Allow the wash to dry completely before adding further layers or details.
Dry Brush Technique: Adding Texture and Detail
The dry brush technique involves using a brush with minimal water, resulting in textured and detailed brush strokes. Here’s how to employ the dry brush technique effectively:
- Load your brush with concentrated pigment and remove excess moisture.
- Apply the brush lightly and swiftly over the dry paper surface.
- Use short, controlled strokes to create texture and define details.
- Experiment with different brush sizes and pressures for varied effects.
Wet-on-Wet Technique: Embracing Fluidity and Serendipity
The wet-on-wet technique harnesses the fluid nature of watercolors, allowing colors to mix and mingle freely on a wet surface. Follow these steps to master wet-on-wet:
- Wet the paper thoroughly with clean water using a large brush.
- Apply diluted pigment onto the wet surface, allowing it to spread and blend.
- Tilt the paper or use a tilted easel to guide the flow and create organic shapes.
- Embrace the spontaneous nature of the technique and let colors interact naturally.
Wet-on-Dry Technique: Achieving Crisp Lines and Controlled Effects
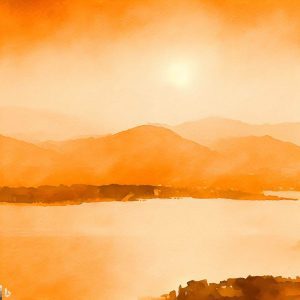
Contrasting the wet-on-wet technique, wet-on-dry involves applying paint onto a dry surface, resulting in controlled and crisp brush strokes. Follow these steps to master wet-on-dry:
- Start with a dry paper surface, ensuring it’s free from moisture.
- Load your brush with concentrated pigment and apply it directly to the dry surface.
- Use confident and deliberate strokes to create defined shapes and lines.
- Allow each layer to dry before adding subsequent layers or details.
Advanced Watercolor Brush Strokes for Artistic Expression
Gouache Resist Technique: Incorporating White Pigments for Highlights
The gouache resist technique involves using white gouache as a resist medium, preserving areas of the paper from receiving color. Here’s how to employ this technique:
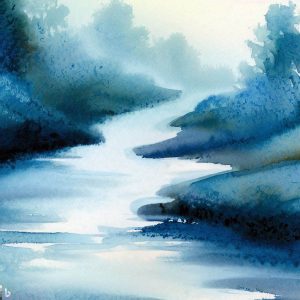
- Apply a layer of diluted gouache on the areas you want to preserve as highlights.
- Allow the gouache to dry completely before proceeding with watercolor washes.
- Apply watercolor washes over the gouache, avoiding the preserved areas.
- Once the painting is dry, gently remove the dried gouache to reveal the highlights.
Sgraffito Technique: Unveiling Layers and Creating Texture
The sgraffito technique adds texture and visual interest by scratching through layers of paint to reveal underlying colors. Follow these steps to incorporate sgraffito into your artwork:
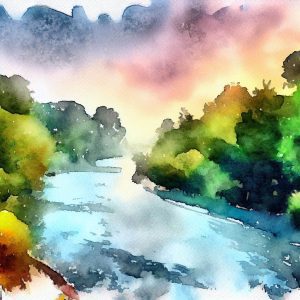
- Apply multiple layers of watercolor washes, allowing each layer to dry completely.
- Use a sharp tool, such as a palette knife or the end of a brush, to scratch through the layers.
- Experiment with different pressures and directions to achieve varied textures.
- Be mindful of the color combinations and the impact of the revealed layers.
Splattering Technique: Adding Dynamic and Expressive Elements
The splattering technique introduces an element of spontaneity and dynamism to your artwork. Follow these steps to incorporate splatters into your watercolor paintings:
- Load your brush with diluted paint, ensuring it’s not too watery or too concentrated.
- Hold the brush close to the paper surface and use your finger or another brush to tap it.
- Experiment with different flicking motions and distances for varied splatter effects.
- Use a mask or protective sheet to prevent unwanted splatters on specific areas.
Lifting Technique: Correcting Mistakes and Creating Highlights
The lifting technique allows you to correct mistakes or create highlights by lifting off paint from the paper surface. Follow these steps to master the lifting technique:
- Wet a clean brush with water and gently dab it onto the area you want to lift.
- Blot the wet area with a clean tissue or sponge to remove the paint.
- Repeat the process if necessary, being careful not to damage the paper surface.
- Use this technique strategically to refine details or adjust tonal values.
Negative Painting: Defining Shapes with Surrounding Colors
Negative painting involves defining shapes by painting around them rather than directly applying color to them. This technique relies on the contrast between the painted shapes and the surrounding colors. Here’s how to incorporate negative painting into your artwork:
- Start by painting the background or the surrounding areas of the desired shape.
- Gradually build up layers, allowing each layer to dry before adding subsequent ones.
- Use masking fluid or tape to protect the shapes you want to keep unpainted.
- Create depth and dimension by varying the colors and values of the surrounding areas.
Glazing Technique: Layering Translucent Colors for Depth
The glazing technique involves layering multiple translucent washes to create depth, richness, and luminosity in your watercolor paintings. Follow these steps to employ the glazing technique effectively:
- Start with a dry base layer of watercolor, preferably a light and neutral tone.
- Apply subsequent layers of diluted washes, allowing each layer to dry before adding the next.
- Gradually build up the colors, adjusting the intensity and value with each glaze.
- Experiment with different color combinations and layering techniques to achieve desired effects.
Masking Fluid Technique: Preserving White Areas and Details
Masking fluid is a liquid latex compound that can be applied to specific areas to protect them from receiving paint. This technique allows you to preserve white areas or intricate details within your watercolor paintings. Here’s how to use masking fluid effectively:
- Shake the masking fluid bottle thoroughly and apply it using a brush or a pen nib.
- Allow the masking fluid to dry completely before proceeding with your watercolor washes.
- Apply watercolor washes freely, covering the masked areas without worrying about paint seeping in.
- Once the painting is dry, gently rub or peel off the masking fluid to reveal the preserved areas.
Washes vs. Dry Brush: Choosing the Right Technique for Your Artwork
Determining whether to use washes or dry brush techniques depends on the desired effect and the subject matter of your artwork. Consider the following factors when deciding between washes and dry brush:
- Washes: Ideal for creating smooth gradients, soft backgrounds, and fluid transitions.
- Dry Brush: Suitable for adding texture, detail, and emphasizing specific areas or elements.
Mastering Watercolor Brush Strokes: Practice Exercises and Projects
Exercise: Creating Gradient Blends with Wash Technique
This exercise focuses on honing your skills in creating smooth and seamless gradient blends using the wash technique. Follow these steps to practice:
- Choose two or more colors that harmonize well together.
- Wet the paper surface evenly with clean water using a large brush.
- Load your brush with the first color and apply it to one end of the wet surface.
- Rinse your brush and load it with the second color, then apply it next to the first color.
- Gradually blend the colors together by tilting the paper or guiding the flow of the pigment.
- Experiment with different color combinations and blending techniques to achieve desired results.
Project: Painting a Floral Composition with Varied Brush Strokes
This project allows you to apply a range of brush strokes and techniques to create a vibrant and dynamic floral composition. Follow these steps to complete the project:
- Select a reference image of a floral arrangement that inspires you.
- Sketch the basic outlines of the flowers and leaves lightly on watercolor paper.
- Begin painting the flowers using a combination of washes, wet-on-wet, and wet-on-dry techniques.
- Add details and texture using dry brush strokes, splattering, or sgraffito techniques.
- Paint the leaves and background, incorporating negative painting or glazing techniques.
- Continue refining your painting by adding layers and building up colors gradually.
- Don’t be afraid to experiment with different brush sizes, shapes, and pressures to capture the essence of the flowers.
- Take breaks and step back to assess your painting from a distance, making adjustments as necessary.
Conclusion
In conclusion, mastering watercolor brush strokes is a journey that requires practice, experimentation, and a deep understanding of the techniques involved. By exploring various brush types, practicing fundamental strokes, and embracing advanced techniques, you can elevate your watercolor paintings to new levels of artistic expression.
Remember to care for your brushes properly, clean them after each painting session, and store them appropriately to ensure their longevity. Experiment with different techniques, such as washes, dry brush, wet-on-wet, wet-on-dry, and advanced techniques like gouache resist, sgraffito, splattering, negative painting, glazing, and masking fluid.
Keep in mind that the beauty of watercolor lies in its fluidity, serendipity, and the unique characteristics of each brush stroke. Embrace the unexpected, learn from your mistakes, and let your creativity flow. With dedication and practice, you’ll develop a personal style and confidently master the art of watercolor brush strokes.
FAQs: Addressing Common Questions about Watercolor Brush Strokes
FAQ 1: How long does it take to master watercolor brush strokes?
FAQ 2: Can I use the same brushes for different watercolor techniques?
FAQ 3: How can I avoid brush strokes showing in my watercolor paintings?
- Use larger brushes for broader areas to achieve smoother washes and gradients.
- Dilute your pigments with water to create more transparent washes, reducing the visibility of individual brush strokes.
- Apply multiple layers of thin washes, allowing each layer to dry before adding the next, to create smooth color transitions.
- Experiment with different brush pressures and techniques like wet-on-wet or glazing to blend colors seamlessly.
- Utilize softer brushes with natural hair bristles, which tend to leave softer marks compared to stiffer synthetic brushes.
- Practice brush control and refine your technique through consistent practice and observation.
FAQ 4: How can I fix mistakes or accidents in watercolor brush strokes?
- Lift off excess paint or correct errors by gently blotting the area with a clean, damp brush or a tissue.
- If the mistake is minor, you can try incorporating it into your painting by adjusting other elements to maintain balance and harmony.
- Use opaque watercolors like gouache or acrylic paint to cover larger mistakes or make corrections.
- Allow the area to dry completely before attempting any corrections to avoid further smudging or blending.
- Remember that some mistakes can be embraced and transformed into unique features of your artwork. Don’t be afraid to experiment and let accidents guide your creative process.
FAQ 5: How can I add depth and dimension to my watercolor brush strokes?
- Gradually build up layers of transparent washes, allowing each layer to dry before adding the next. This technique, known as glazing, creates richness and depth in your painting.
- Incorporate contrasting values by combining light and dark tones in your brushwork. This contrast adds dimension and creates visual interest.
- Utilize techniques like negative painting, where you paint around the subject to define its shape, or sgraffito, which involves scratching through layers to reveal underlying colors or textures.
- Experiment with different brush pressures, angles, and techniques like dry brush or splattering to add texture and create three-dimensional effects.
- Pay attention to light and shadow in your subject matter, observing how they interact and using brush strokes to capture the play of light and depth.
FAQ 6: How can I develop my own style with watercolor brush strokes?
- Study the works of various watercolor artists, both contemporary and historical, to gain inspiration and understand different approaches to brushwork.
- Experiment with different techniques, brushes, and subject matters. Allow yourself to explore and discover what resonates with you personally.
- Embrace imperfections and unique characteristics in your brushwork. Remember that your individuality as an artist lies in your distinct brush strokes.
- Practice regularly and reflect on your own artwork. Identify elements that you enjoy creating and techniques that resonate with your vision.
- Seek feedback from trusted peers, mentors, or art communities. Constructive criticism can provide valuable insights and help you refine your style.
- Trust your intuition and let your brush strokes flow naturally. Express your emotions and experiences through your artwork, and your style will evolve organically over time.
