Watercolor painting is an enjoyable hobby for beginners and experts alike. However, it can be frustrating when you make mistakes and feel like your painting is ruined. The good news is that many common watercolor mishaps can be fixed, allowing you to salvage your work. With some helpful tips on preventing errors and techniques for correcting them, you can continue creating beautiful watercolor art.
This article will cover:
- Preventing watercolor mistakes before you start painting
- Step-by-step instructions for fixing various common watercolor errors
- When it’s best to just start over with a new sheet of paper
- Pro tips for avoiding problems with future watercolor projects
Ready to learn how to rescue your watercolors and continue painting with confidence? Let’s begin!
Preventing Watercolor Mistakes
The best way to fix watercolor mistakes is to avoid them in the first place. Here are some key tips to prevent common issues that can ruin your painting:
Choose the Right Supplies
- Paper: Use 100% cotton heavyweight watercolor paper with a cold press or rough texture. This will prevent warping and help the paint adhere properly. Strathmore, Fabriano, and Arches are quality brands.
- Brushes: Have a variety of brush types on hand in different sizes. Natural hair brushes hold color better. Make sure they have a good point and hold their shape when wet.
- Paints: Artist-grade paints have more pigment for richer mixing. If you’re a beginner, start with a primary color set.
Learn Basic Techniques
- Practice washes: Do some wash exercises on scrap paper to get a feel for how wet your brush should be and how much paint to use.
- Control water: Limit your water to avoid overly diluted paint that can bleed uncontrollably.
- Mix colors carefully: Start with small amounts of paint in your mixes to prevent ending up with gray mud.
Plan Out Your Painting
Do some thumbnail sketches to map out what you want to paint. Identify areas that will be white before you start applying color washes near them. Have a clear vision in mind to follow as you work.
Fixing Common Watercolor Mistakes
Video Tutorial Fixing 10 Mistakes
Even if you prepare properly, some watercolor mistakes can still occur. Here are some of the most common issues and how to rescue your painting:
Too Much Water
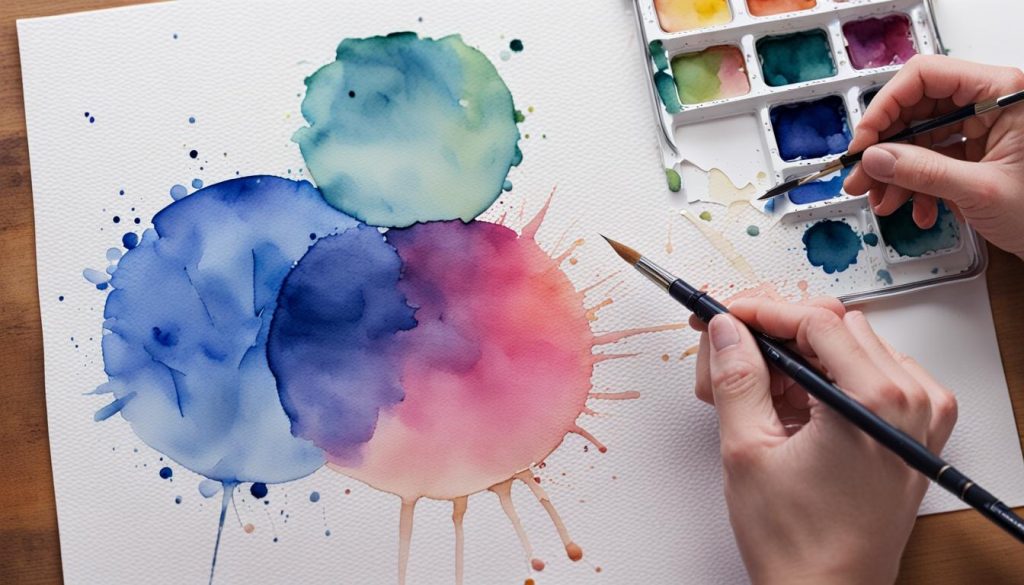
Using too much water results in weak washes with little color payoff.
How to Fix:
- Wait for it to fully dry
- Apply another layer of color mixed with less water
- Use less saturated colors if the paper buckles
Heavy-Handed Brushstrokes
Bearing down too hard with the brush leaves unwanted hard edges and streaks of thick paint.
How to Fix:
- Let it dry fully
- Soften edges with clean, wet brush
- Sand down ridges gently with fine grit sandpaper
Muddled Colors
Too much mixing can quickly make all your colors turn brown and lifeless.
How to Fix:
- Let existing layers dry
- Glaze over with more fresh paint
- Embrace the mud and make it work in your design!
Unwanted Bleeding
Wet paint creeping outside your intended lines is frustrating.
How to Fix:
- Use liquid frisket as barriers while wet
- Apply fresh layers of color to problem edges
- Leverage negative painting techniques
Losing White Areas
It’s easy to accidentally paint over white areas you wanted preserved in your original sketch.
How to Fix:
- Apply liquid frisket before glazing nearby colors
- Use a craft knife to gently scrape paint back down to the white paper
- Spot correct with white gouache paint or gel pens
Hard Edges
Sometimes an area that should have soft, blurred edges ends up with a harsh line instead.
How to Fix:
- Wet clean brush and soften while still damp
- Use brush tip to disturb edge and feather out paint
- Apply more layers of glazes to make hard transitions gradual
Step-by-Step Process for Fixing Mistakes
When you encounter issues in your watercolor painting, follow this methodical approach:
- Let the paint layer dry fully. This gives you a stable surface to work on.
- Assess if the mistake can be fixed. Some errors (like mold or paint chemically altering the paper) mean you’ll have to scrap this sheet.
- Do surface preparation. Gently smooth ridges by lightly sanding the problem area. Scrape away excess paint carefully with a craft knife.
- Preserve white areas. Use liquid frisket as a barrier to keep white paper or light washes visible before glazing.
- Apply new paint. Start by glazing transparent layers of color, allowing them to dry between applications. This lets you slowly build the fixed area back up.
- Check edges. Make sure they have softened properly. Use clean, wet brushes to further blur them.
- Spot correct. At the very end, use white gouache or gel pens to fix small mistakes or brighten dull sections.
Take a methodical approach, moving slowly, and you can rescue even fairly disastrous watercolor mistakes! Patience and persistence pay off.
When to Just Start Over
While many watercolor mistakes can be remedied with the right techniques, some issues just can’t be fixed. It’s better to know when to call it quits on a particular painting and start fresh on new paper or board.
Here are signs it’s time to start over:
- Paint has chemically altered or damaged the paper beyond repair
- Warping is severe enough that the paper can’t be stretched flat
- Central aspects of the composition are irreparably obscured
- Too many mistakes have made it look overworked and messy
Don’t fret if you have to scrap a piece! Here are ways to still get value from the experience:
- Salvage parts: Cut out any passages you like and collage them into a new work.
- Repurpose the paper: Allow it to fully dry, then sand down and reuse the back.
- Take notes: Analyze what went wrong so you don’t repeat the same mistakes. See the failed painting as one step in your artistic journey!
Knowing when further effort is fruitless prevents further frustration. Be ready to surrender a painting to the scrap pile when needed.
Preventing Future Mistakes
Learning how to fix watercolor mistakes is useful, but avoiding common errors in the first place should be your main goal moving forward. Here are some key takeaways to apply to your next painting session:
Prepare your paper properly: Always tape down your watercolor paper tightly to a sturdy backing board so it stays perfectly flat while working. This prevents buckling.
Control your brush and water: Don’t overload your brush with too much liquid. Start with a damp brush and add controlled amounts as needed. Master basic washes before attempting wet-on-wet techniques.
Check backgrounds before adding foreground details: Be aware of areas that need to remain white or light and preserve them early on.
Work from large areas to small: Apply broad washes first, gradually refining details. This prevents color bleeding.
Take breaks and let layers dry: Build up the painting slowly across multiple short sessions allowing the paper to fully dry in between while maintaining looseness.
Perfectionism kills creativity with watercolors. Embrace mistakes as you hone your artistic voice! Skill comes from fearless practice. With patience and these handy fixes for common watercolor mishaps, you can continue to grow your abilities and develop stunning works.
Mistakes of Master Artists
It can help boost your confidence as a growing watercolorist to examine respected watercolor paintings and find flaws, drips, unevenness, and other “mistakes” even within museum-quality works created by renowned artists.
Some examples of watercolor mistakes:
Winslow Homer: His quick, vivid seascapes and waterside scenes, though lively, often have areas of bleeding color that spread outside intended borders. He let them be in keeping with the spontaneous style.
John Singer Sargent: Regarded portraits have sections of background or clothing with scrapes that remove layers down to the white paper and visible brush marks from changes. Yet these “imperfections” enhance the loose, immediate quality he was known for.
Charles Reid: This contemporary master creates beautiful florals and landscapes with his signature wet-on-wet style, yet zooming in shows bleeding edges, muddy mixes, uneven washes, and other issues – proving perfection isn’t required for mastery!
The takeaway is to not be overly precise or hard on yourself about avoiding or fixing every minor mistake. Some of the medium’s charm comes from its unpredictable nature. Hone your skills but also develop your own signature style that embraces the delicate fluidity that water and pigment lend themselves to by their very essence.
Watercolor Mistakes Conclusion
The free-flowing nature of watercolors makes them susceptible to certain mistakes, especially for beginners. But rather than giving up in frustration when you encounter problems, utilize the techniques covered in this article to rescue your paintings.
The key is staying optimistic and taking a systematic approach. Let layers fully dry, then gradually build them back up through transparent glazes or opaque spot corrections with white gouache. Softening hard edges also brings cohesion back to a damaged area.
With some strategic planning and awareness before applying brush to paper, you can avoid issues altogether. Take it slowly and thoughtfully. Test colors first, control water levels, and preserve white areas early on.
Watercolor is meant to be fun! It has a mind of its own. But by understanding how to prevent and fix common mistakes, you gain more creative control while still embracing beautiful accidents that contribute to your unique style.
Both beginners and experts alike experience mishaps. Let your mistakes guide you rather than discourage you. And remember – some of the world’s most renowned watercolor art contains flaws that the artist chose to incorporate, making the piece that much more awe-inspiring and real.
So pick up your brush, play with vibrant paints, and create breathtaking works bursting with life, texture, and movement. Don’t stress errors – just fix them! With resilience and these tips for avoiding pitfalls, this fluid medium can become your new favorite way to translate the world’s colors onto paper.
