
Learning one point perspective drawing is like discovering the secret to making flat drawings come alive with depth and dimension. Whether you’re sketching a city street or designing a simple room, mastering this fundamental art technique will transform your artwork from basic shapes into realistic, three-dimensional scenes that jump off the page.
Key Points Summary
- One point perspective uses a single vanishing point to create depth
- The horizon line represents your eye level in the drawing
- Construction lines guide all receding parallel lines to the vanishing point
- This technique works best for frontal views and simple scenes
- Practice with basic shapes before attempting complex subjects
What is One Point Perspective Drawing?
One point perspective drawing is a linear perspective technique that creates the illusion of depth using a single vanishing point. Think of it like looking down a long hallway or railroad tracks – everything seems to get smaller and closer together as it moves away from you, eventually meeting at one distant point.
This drawing method relies on three essential elements: the vanishing point (where all parallel lines converge), the horizon line (representing your eye level), and construction lines (guidelines that help maintain proper proportions). Unlike more complex perspective systems, one point perspective keeps things simple by using just one focal point, making it perfect for painting fundamentals and beginner drawing guide.
Understanding Perspective in Art
Interactive Street View Demonstration
🎨 Art Technique: One-Point Perspective
What you’re seeing: A realistic street view with proper 3D buildings that follow perspective rules. Notice how buildings maintain their proportions and depth as the vanishing point changes.
Key Elements:
• Eye Level (Horizon): Your viewing height – buildings above this line angle down, below angle up
• Vanishing Point: Where all parallel lines converge in the distance
• 3D Depth: Buildings show front and side faces with proper foreshortening
Painting Tip: Notice how each building has visible front and side faces that recede toward the vanishing point. This creates convincing 3D form that makes your artwork feel dimensional and realistic.
The beauty of this technique lies in its mathematical precision combined with artistic flexibility. Artists have used linear perspective since the Renaissance to create convincing spatial representation in their work. Today, it remains equally important for digital artists, comic creators, and traditional painters who want to add dimensional accuracy to their creations.

Essential Elements of One Point Perspective
The Vanishing Point

The vanishing point acts as your drawing’s anchor – it’s the spot where all parallel lines that recede into the distance appear to meet. In one point perspective, you’ll place this single point somewhere along your horizon line. The location you choose dramatically affects your composition’s mood and focus.
Horizon Line and Eye Level
Your horizon line represents the viewer’s eye level and runs horizontally across your drawing. Everything above this line appears to be looked down upon, while everything below seems to be viewed from above. Understanding this relationship helps create more convincing three-dimensional drawing results.
Construction Lines and Convergence
Construction lines are your invisible helpers – light guidelines that connect your subjects to the vanishing point. These orthogonal lines ensure that all receding surfaces maintain proper proportional scaling as they move toward the distance.
“Perspective is not a science but an art, and the artist who ignores its principles does so at his own peril.”
Step-by-Step One Point Perspective Tutorial
Setting Up Your Drawing Foundation
Start by drawing a horizontal line across your paper – this becomes your horizon line. Choose a point anywhere along this line for your vanishing point and mark it clearly. This setup forms the backbone of your entire perspective system.
Drawing Your First Cube

- Create the front face: Draw a square anywhere on your paper. This square remains unchanged since it faces you directly.
- Add construction lines: From each corner of your square, draw light lines extending toward your vanishing point.
- Define the depth: Decide how deep you want your cube, then draw horizontal and vertical lines to connect the construction lines, forming the back edges.
- Clean up your drawing: Darken the visible edges and erase unnecessary construction lines.
This simple exercise teaches you the fundamental principles that apply to more complex subjects. Practice this cube exercise multiple times before moving to other shapes or scenes.
Expanding to Complex Shapes
Once you’ve mastered the basic cube, try drawing rectangular prisms of different sizes and orientions. Each new shape follows the same rules: front faces remain undistorted, while receding lines converge toward your vanishing point.
Drawing Tips for Success:
- Keep construction lines light and easily erasable
- Maintain consistent line weights for finished edges
- Practice geometric perspective before attempting organic subjects
- Use proper drawing materials – a ruler helps maintain straight construction lines
Common One Point Perspective Drawing Mistakes
Understanding frequent errors helps you avoid frustration and improve faster. The most common mistake beginners make involves placing the vanishing point incorrectly or inconsistently applying convergence rules.

Vanishing Point Placement Errors
Many beginners place their vanishing point off the horizon line or change its location mid-drawing. Remember: your vanishing point must stay fixed on the horizon line throughout your entire drawing. Moving it creates perspective distortion that makes your artwork look unnatural.
Inconsistent Construction Lines
Another frequent error involves drawing construction lines that don’t properly converge. Every line representing a receding parallel surface must point toward your vanishing point. Even small deviations create noticeable problems in your finished artwork.
Learning from these common beginner mistakes accelerates your artistic development and builds confidence in your drawing skills.
Practical One Point Perspective Applications

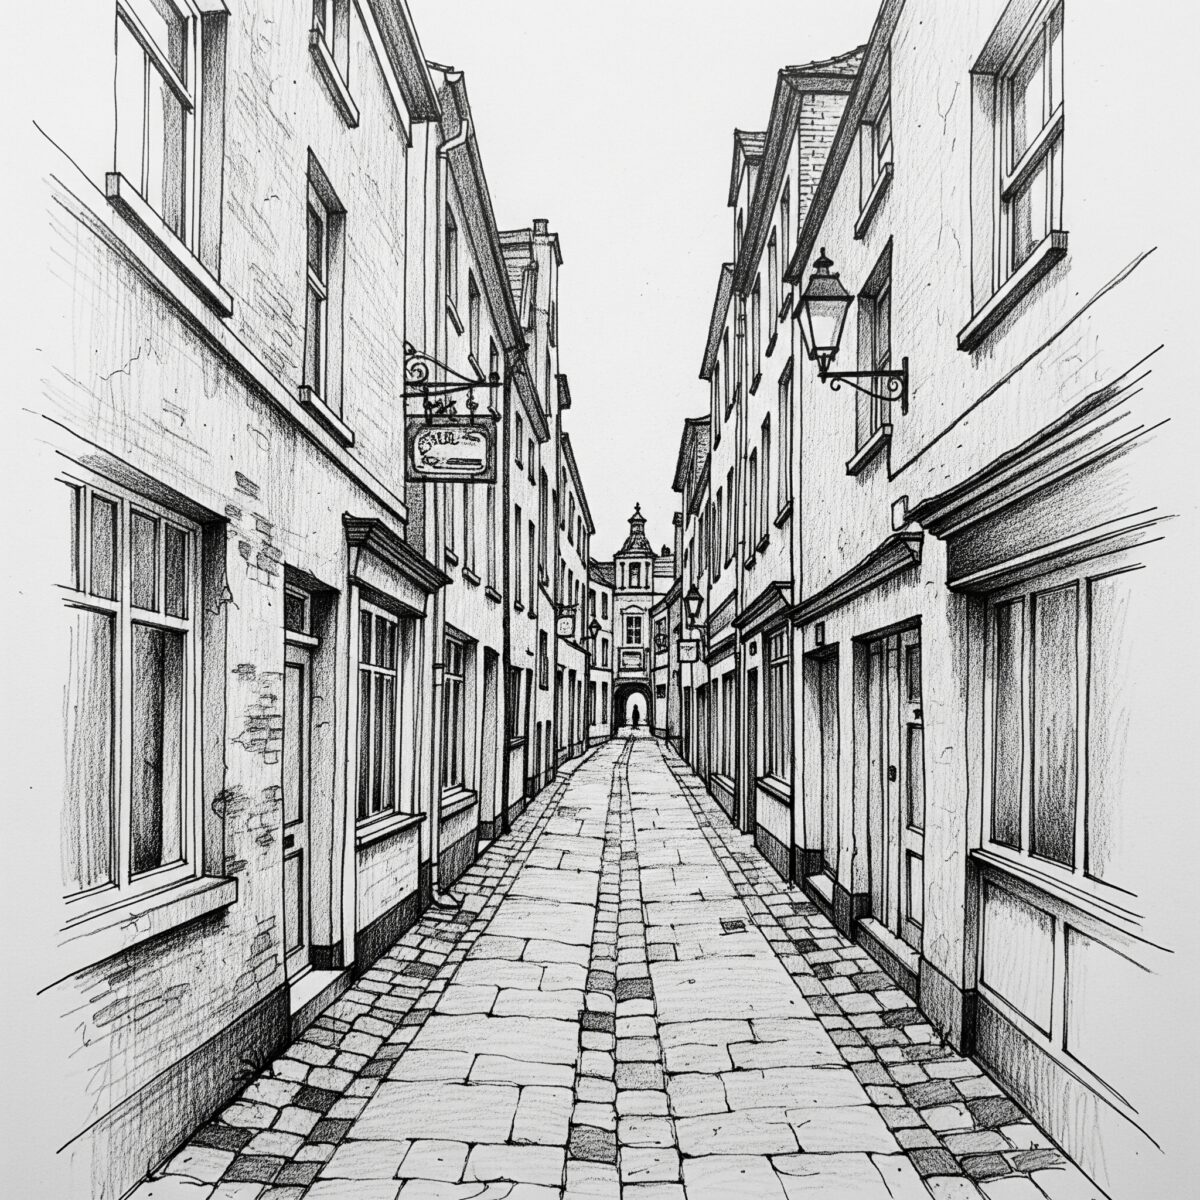
Creating Street Scenes
Street scenes provide excellent practice for one point perspective techniques. Position your vanishing point at the end of the street, then use it to guide building edges, road lines, and architectural details.
The key to convincing street scenes lies in varying building heights and adding details that follow perspective rules. Windows, doors, and signs all become smaller as they recede toward the vanishing point, enhancing your scene’s depth perception.
Interior Room Drawings
Drawing interior spaces teaches you how one point perspective handles enclosed environments. Place your vanishing point on the far wall, then use construction lines to guide floor tiles, ceiling beams, and furniture placement.
Typography in Perspective
Block letters drawn in one point perspective create dramatic effects for signs, logos, and artistic text. Each letter’s front face remains normal, while the sides recede toward your vanishing point, creating the illusion of dimensional lettering.
For more advanced techniques for adding depth, explore how atmospheric perspective combines with linear perspective to create even more convincing spatial effects.
Essential Practice Exercises for Beginners

Regular practice builds muscle memory and confidence. These sketchbook practice ideas help develop your perspective skills systematically:
| Exercise | Difficulty | Focus Area |
|---|---|---|
| Simple cubes | Beginner | Basic construction |
| Letter blocks | Beginner | Shape variation |
| Room corners | Intermediate | Interior spaces |
| Street views | Intermediate | Complex scenes |
| Furniture groups | Advanced | Multiple objects |
Start with geometric shapes, then progress to real-world objects. Each exercise reinforces the fundamental principles while introducing new challenges.
The essential drawing tips from experienced artists emphasize consistent practice over perfect results. Focus on understanding the process rather than creating masterpieces immediately.
When to Use One Point Perspective in Art
One point perspective works best for frontal compositions where you’re looking directly at your subject. It’s perfect for hallways, roads, railways, and any scene with strong linear elements leading toward a single focal point.
However, this technique has limitations. It doesn’t work well for objects viewed from angles or scenes requiring multiple focal points. Understanding when to apply one point perspective versus two-point or three-point perspective helps you choose the right approach for each artistic situation.
Consider one point perspective for:
- Architectural front views
- Interior room studies
- Street scenes with central focus
- Typography and lettering projects
- Educational illustrations and diagrams
YouTube Tutorial Recommendation
For visual learners, check out “One Point Perspective Drawing Tutorial for Absolute Beginners” by Proko on YouTube. This comprehensive video demonstrates the techniques discussed in this article with clear, step-by-step visual instruction.
Frequently Asked Questions
What’s the difference between one point and two point perspective? One point perspective uses a single vanishing point for frontal views, while two point perspective uses two vanishing points for corner views of objects. One point is simpler and works best when looking directly at a subject’s face.
How long does it take to learn perspective drawing? Basic one point perspective can be learned in a few practice sessions, but mastering it takes months of regular practice. Focus on understanding the principles first, then build speed and accuracy through repetition.
Why is perspective important in drawing? Perspective creates the illusion of three-dimensional space on a flat surface. Without it, drawings look flat and unconvincing. It’s one of the fundamental art principles that separates amateur work from professional-quality art.
What tools do I need for perspective drawing? You need basic drawing materials: pencils, paper, an eraser, and a ruler for construction lines. Many artists also use perspective grids as practice aids.
Can I learn perspective drawing without formal training? Yes! With dedicated practice and good resources, you can master perspective drawing independently. Focus on understanding the underlying principles and practice regularly with simple exercises before attempting complex subjects.
Conclusion
Mastering one point perspective drawing opens doors to creating artwork with convincing depth and professional quality. By understanding vanishing points, horizon lines, and construction line principles, you’ve gained a fundamental skill that enhances every drawing you create. Remember that developing your artistic abilities requires patience and consistent practice, but the results are worth the effort.
Whether you’re sketching architectural studies, designing comic panels, or exploring composition fundamentals, one point perspective drawing provides the foundation for creating art that truly captures three-dimensional space. Start with simple exercises, practice regularly, and gradually challenge yourself with more complex subjects as your confidence grows. Of course, convert drawings to paintings!

Ready to expand your artistic knowledge? Explore more drawing techniques and art fundamentals at ProminentPainting.com, your ultimate guide to painting and drawing mastery.

