
Hands are universally recognized as one of the most challenging, yet profoundly expressive, parts of the human body to draw. Their intricate structure, fluid movements, and ability to convey a vast spectrum of emotions make them a fascinating subject for artists. From delicate gestures to powerful grips, mastering drawings in hands is a milestone for any aspiring artist.
_-_animation01.gif "Mastering Drawings in Hands: A Comprehensive Guide to Realistic Hand Art 3")
Key Points Summary:
- Understanding hand anatomy is essential for realistic drawings in hands
- Breaking down complex hand poses into simple geometric shapes makes drawing easier
- Proper use of perspective and foreshortening creates believable depth
- Value and shading techniques bring volume and life to hand drawings
- Common mistakes include stiff poses, incorrect proportions, and lack of dimension
- Regular practice with observation and photo references accelerates improvement
This comprehensive guide aims to demystify the process, providing you with the knowledge and techniques needed to draw realistic and dynamic hands. We’ll explore everything from foundational anatomy to advanced drawing tips, helping you overcome common hurdles and infuse your hand art with life and authenticity. Get ready to transform your understanding and elevate your artistic skills.
The Anatomy of a Hand: Foundations for Accurate Drawings
To draw realistic hands, a basic understanding of their underlying structure is essential. The hand is made up of 27 bones, divided into three main groups: the carpals (wrist bones), metacarpals (palm bones), and phalanges (finger bones). Understanding how these bones connect and move will help you achieve correct proportions and natural-looking poses.

Think of the hand as a complex machine where every part works together. The carpals in your wrist act like tiny building blocks that allow your hand to rotate and flex. The metacarpals form the foundation of your palm, creating that solid base we all recognize. The phalanges (your finger bones) are arranged in three segments for each finger, except the thumb, which only has two segments.
Beyond the bones, muscles and tendons give the hand its bulk, flexibility, and unique contours. You don’t need to memorize every single muscle, but knowing where the major muscle groups are (like those in the thumb base and along the palm) will help you create believable volume and natural creases. Observe how the skin stretches and folds over these structures during different movements.
The most important muscle groups for artists to understand include:
- The thenar muscles (thumb base) that create that fleshy mound
- The hypothenar muscles (pinky side of palm) that form the outer edge
- The interosseous muscles between the metacarpals that help with finger spreading
When you’re working on figure drawing and anatomy, remember that hands follow the same principles as the rest of the body. Just like understanding light and shadow in art, knowing the underlying structure helps you place highlights and shadows in the right locations.
Understanding Hand Proportions and Measurements
Getting the proportions right is crucial for believable drawings in hands. Here are some essential measurements that professional artists use:
Basic Hand Proportions:
- The palm is roughly square-shaped
- The middle finger is approximately the same length as the palm
- The ring finger is slightly shorter than the middle finger
- The index finger reaches about to the fingernail of the middle finger
- The pinky finger reaches to the last joint of the ring finger
- The thumb reaches approximately to the first knuckle of the index finger
One helpful trick is to remember that when the hand is flat, you can fit about three “eye widths” across the palm. This measurement technique, similar to what you’d use in portrait work, helps maintain realistic proportions across your entire composition.
The fingers also follow a natural arc when curled. If you extend lines from the fingertips when making a gentle fist, they’ll all converge toward the base of your wrist. This natural curvature is what separates stiff, robotic-looking hands from natural, believable ones.
Mastering Hand Poses: Expressing Emotion and Action
Hands are incredibly powerful communicators, often conveying emotions and intentions even more clearly than facial expressions. A relaxed open palm speaks of welcome, while a clenched fist signals anger or determination. From pointing to praying, the gesture of a hand adds depth and narrative to any drawing or painting.
To master diverse hand poses, start by observing. Use your own hands as a primary model, experimenting with different gestures and photographing them from various angles. Pay attention to how the fingers curve, how the thumb interacts with the palm, and the overall silhouette of the hand. Practice drawing these basic forms first before adding intricate details.
Common Hand Gestures and Their Meanings:
- Open palm facing up: Openness, giving, receptiveness
- Closed fist: Strength, anger, determination
- Pointing finger: Direction, accusation, emphasis
- Thumbs up: Approval, agreement, success
- Interlaced fingers: Contemplation, prayer, nervousness
- Relaxed fingers: Calm, peace, comfort
- Grasping pose: Holding, possession, control
When starting with drawing for beginners basics, it’s tempting to avoid hands altogether. Don’t fall into this trap! Instead, break down complex poses into simple shapes first, just like you would with easy things to draw for practice.

Essential Techniques for Realistic Hand Drawings
Achieving realism in your drawings in hands requires applying specific artistic techniques. These methods will transform your sketches from flat outlines into three-dimensional, lifelike representations.
Start with Simple Shapes
Begin by breaking down the hand into basic geometric forms. Think of the palm as a rectangular box or wedge shape. Each finger can be simplified into three connected cylinders or rectangles. The thumb, while more mobile, follows similar principles with two segments.
This approach, fundamental to all painting techniques for beginners, allows you to establish the overall structure before worrying about details. Once you have the basic boxes and cylinders in place, you can start refining the curves and adding natural contours.
Master Perspective and Foreshortening
Perspective is especially challenging with hands because they’re often pointing toward or away from the viewer. When a hand reaches forward, the fingers appear shorter due to foreshortening. The parts closest to you look larger, while parts farther away shrink dramatically.
Think of the hand as a series of overlapping planes. When drawing a hand reaching toward you, the palm becomes a large, flat shape, while the fingers might appear as small ovals or circles. This is where understanding how to create depth in paintings becomes crucial – the same principles apply to drawings.
Practice drawing hands in various perspectives:
- Side view (profile) – easiest to start with
- Front view (palm facing viewer) – shows full hand structure
- Back view – demonstrates knuckles and tendons
- Three-quarter view – most common in compositions
- Foreshortened views – most challenging but dynamic
Apply Proper Shading and Form
Value and shading breathe life into your drawings in hands. Understanding where light hits the hand reveals its curves, contours, and three-dimensional form. The principles of mastering shadow in art apply directly to hand drawing.

Key Areas to Shade:
- The spaces between fingers (often in shadow)
- The underside of the palm when hand is raised
- The area where the thumb meets the palm
- The knuckles (they catch light when curved)
- The fingernails (they have subtle reflective highlights)
- Cast shadows on surfaces the hand rests on
Build up your values gradually, starting light and adding darker tones. This layering technique, whether you’re using pencil, charcoal, or digital tools, creates depth and prevents your drawing from looking flat.
Consider the direction of your light source. A single light source creates the most dramatic and readable forms. Side lighting emphasizes texture and wrinkles, while front lighting softens features and creates a gentler look.
Line Weight and Detail Work
Varying your line weight adds another dimension to your drawings in hands. Thicker lines can define outer edges and areas in shadow, while thinner lines suggest lighter areas or delicate details like fingernails and skin creases.
Line Weight Guidelines:
- Use heavier lines where fingers overlap to create depth
- Apply lighter lines for wrinkles and fine details
- Emphasize the outer contour with a bolder line
- Vary line thickness naturally – perfectly uniform lines look mechanical
- Let some lines fade or taper naturally
When adding details like wrinkles and skin texture, less is often more. Too many lines can make hands look ancient or overly busy. Focus on the major creases:
- Palm lines (heart line, head line, life line)
- Knuckle creases on the back of fingers
- Wrist creases where hand meets forearm
- Nail beds and cuticles (suggested, not overworked)
“Drawing is not what you see but what you must make others see.”
Edgar Degas
This quote perfectly captures the essence of drawing hands. You’re not just copying what’s in front of you; you’re translating three-dimensional forms onto a two-dimensional surface in a way that makes sense to the viewer.
Solving Common Hand Drawing Difficulties
Even experienced artists struggle with hands. Let’s address the most frequent challenges and provide practical solutions for improving your drawings in hands.
| Challenge | Description | Solution / Tip |
|---|---|---|
| Stiff, Lifeless Hands | Hands look rigid, unnatural, or like gloves without bones | Focus on underlying bone structure and natural curves. Use gestural lines first to capture flow. Draw your own hand in the pose to feel the natural tension |
| Incorrect Proportions | Fingers too long/short, palm too wide/narrow compared to reality | Use measurement techniques (finger length relative to palm) and simplify into basic geometric shapes before detailing. Compare proportions constantly |
| Foreshortening Errors | Hands appear flat or distorted when pointing towards or away from the viewer | Break the hand into stacked planes (palm, fingers) and draw as overlapping cylinders/cuboids. Practice perspective grids |
| Lack of Volume/Depth | Hands look flat, without 3D form and dimension | Apply proper shading to show light and shadow, highlighting contours and muscle definition. Think of the hand as a series of rounded forms |
| Cloned Fingers | All fingers look identical and evenly spaced, lacking natural variation | Vary finger lengths and angles. Remember each finger moves independently, and they often overlap slightly in natural poses |
| Floating Hands | Hands don’t appear grounded or connected to the body | Include part of the wrist or arm to anchor the hand. Add cast shadows to ground it in space |
| Oversimplified Thumb | Thumb looks wrong or attached incorrectly | Remember the thumb rotates from a different point than fingers. Study its unique range of motion |
| Ignored Anatomy | Generic hands without consideration for bone and muscle structure | Study anatomy references regularly. Even simplified drawings benefit from anatomical understanding |

Practice Exercises for Improving Hand Drawings
Consistent practice is the key to mastering drawings in hands. Here are targeted exercises that will accelerate your improvement:
Daily Quick Sketches (5-10 minutes each):
- Draw your non-dominant hand in 5 different positions
- Sketch hands from various photo references without worrying about perfection
- Focus on capturing the overall gesture rather than details
- Time yourself – quick sketches force you to focus on essentials
Focused Study Sessions (30-60 minutes):
- Choose one hand pose and draw it from 3 different angles
- Create a detailed study including shading and texture
- Draw hands holding various objects (pencil, cup, phone, ball)
- Study and sketch from master artworks focusing on their hand technique
Anatomical Studies:
- Draw the skeletal structure of the hand
- Study how tendons appear on the back of the hand
- Observe and sketch how muscles create volume in the palm
- Watch videos of hands in motion to understand movement
Just as with unique ideas for drawing prompts, having structured practice sessions prevents you from getting stuck. Mix up your exercises to keep things interesting while building comprehensive skills.
Challenge Week Plan:

- Monday: Five 1-minute gesture drawings of hands
- Tuesday: One detailed study of your own hand (30 minutes)
- Wednesday: Draw hands from three photos you find online
- Thursday: Draw hands holding five different objects
- Friday: Focus exclusively on foreshortening practice
- Weekend: Create a finished drawing using everything you’ve learned
Using Reference Materials Effectively
Reference photos and mirrors are your best friends when learning to draw hands. There’s absolutely no shame in using references – even master artists use them constantly!
Best Reference Sources:
- Your own hands (most accessible and free!)
- Online pose libraries like Line of Action or Quickposes
- Figure drawing books with hand references
- Movie screenshots paused at interesting hand positions
- Photography of hands performing specific actions
- 3D hand models you can rotate digitally
When using photo references, don’t just copy them exactly. Instead, understand what you’re seeing. Ask yourself:
- Where is the light coming from?
- How are the fingers positioned relative to the palm?
- What shapes can I see if I squint?
- Where are the darkest shadows falling?
- How would this look from a different angle?
This analytical approach, similar to the critical thinking used in the 7 principles of painting, helps you learn rather than just copy. You’re training your brain to understand hands, not just your hands to copy photos.
Photography Tips for Self-Reference:
- Use natural lighting for the most readable forms
- Take photos from multiple angles of the same pose
- Keep your camera at eye level with your hand
- Don’t use flash – it flattens the form
- Save your best references in organized folders by pose type
Hands in Different Art Styles
While this guide focuses on realistic drawings in hands, understanding how different styles approach hands can expand your artistic vocabulary.
Realistic/Academic Style:
- Accurate anatomy and proportion
- Subtle value transitions
- Detailed wrinkles and skin texture
- Observational accuracy is priority
Stylized/Cartoon Style:
- Simplified shapes (often with only 3-4 fingers)
- Exaggerated proportions for expression
- Minimal detail but clear gesture
- Focus on readability and appeal
Manga/Anime Style:
- Delicate fingers, often elongated
- Minimal knuckle detail
- Clean, confident linework
- Emphasis on graceful poses
Impressionistic Style:
- Gesture and movement over accuracy
- Loose, expressive marks
- Suggestion rather than detail
- Color and value create form
Minimalist/Graphic Style:
- Reduced to essential forms
- Strong silhouettes
- Limited detail for maximum impact
- Often uses solid shapes or limited line
Understanding these different approaches helps you develop your own style while maintaining solid foundational knowledge. Whether you’re exploring digital artwork creation or traditional media, these principles apply universally.
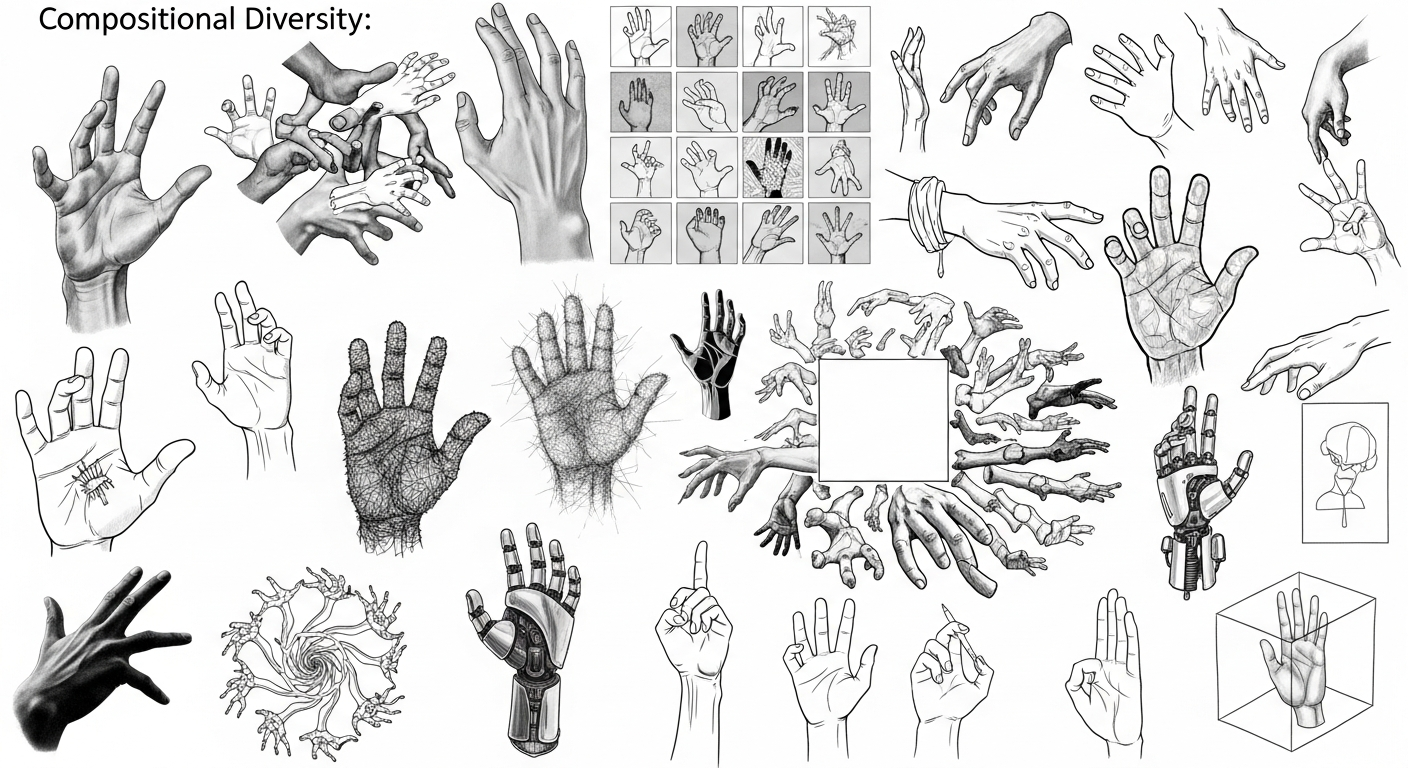
Hands in Context: Composition and Storytelling
Once you can draw individual hands competently, the next challenge is incorporating them effectively into larger compositions. Hands are powerful storytelling tools that can convey relationships, emotions, and actions.
Compositional Considerations:
- Hands can lead the viewer’s eye through a composition
- Pointing gestures direct attention to focal points
- Overlapping hands create depth and spatial relationships
- Hand positions affect the overall balance of your artwork
In portraiture, hands are often considered as important as the face. A person’s hands can reveal their profession, age, emotional state, and personality. Rough, calloused hands tell a different story than soft, manicured ones. Wrinkled, weathered hands convey age and experience.
Storytelling with Hands:
- A mother’s gentle hand on a child’s shoulder: Protection and love
- Clenched fists: Conflict or determination
- Outstretched hands: Offering or receiving
- Hands covering face: Grief, shame, or exhaustion
- Intertwined hands: Connection, partnership, intimacy
- Working hands: Activity, purpose, craftsmanship
Think about famous artworks and how hands contribute to their impact. Michelangelo’s “Creation of Adam” centers on two hands nearly touching. Rodin’s “The Thinker” features a hand supporting a pensive face. The emotional power of these works relies heavily on the expressive quality of the hands.
Advanced Techniques and Considerations
As you progress in your ability to create drawings in hands, you can explore more sophisticated approaches.
Age and Character: Different ages require different hand characteristics:
- Baby hands: Plump, soft, dimpled, short fingers
- Child hands: Small proportions, smooth skin, developing definition
- Adult hands: Full development, clear structure, variable texture
- Elderly hands: Prominent veins, wrinkles, possible arthritis deformation, thinner skin
Gender Differences: While hands vary more by individual than by gender, some general tendencies exist:
- Typically masculine hands: Broader palms, larger knuckles, visible veins, squarer fingernails
- Typically feminine hands: Narrower palms, more tapered fingers, less prominent knuckles, oval fingernails
Remember these are generalizations – many people’s hands don’t fit these stereotypes, and that’s perfectly fine for your art!
Action and Movement: Static hands are one thing; hands in motion present additional challenges:
- Indicate movement with motion lines (sparingly in realistic work)
- Show sequential positions to suggest movement
- Blur or soften edges to indicate speed
- Consider the momentum and follow-through of gestures
- Study how muscles flex and tendons become visible during action
Material and Texture: Different drawing media create different effects:
- Graphite: Excellent for smooth gradations and precise detail
- Charcoal: Creates dramatic values and loose, expressive marks
- Ink: Forces decisive marks, great for studying form without shading
- Colored Pencil: Allows subtle color variations in skin tones
- Digital: Offers unlimited undo and layer experimentation
When working with different art mediums, adapt your hand-drawing approach to suit the medium’s strengths.
Creating a Hand Studies Sketchbook

Professional artists often maintain dedicated sketchbooks for hand studies. This practice reinforces learning and provides a valuable reference library.
Organizing Your Hand Studies:
- Dedicate pages to specific poses (fist, open palm, pointing, etc.)
- Create anatomy reference pages with labels
- Include pages for foreshortening practice
- Add notes about discoveries and struggles
- Date your studies to track improvement over time
Study Documentation:
- Photograph your hand in the pose for reference
- Note the lighting conditions you’re studying
- Record time spent (this helps you see efficiency improvement)
- Write down what felt challenging
- Note breakthrough moments and techniques that worked
Looking back through months of hand studies provides incredible motivation. You’ll see dramatic improvement that’s hard to notice day-to-day. This visual record of progress keeps you motivated during difficult learning phases.
Similar to keeping creative sketchbook ideas for general practice, a focused hand studies sketchbook accelerates your specific skill development.
Digital Tools for Hand Drawing Practice
Modern technology offers fantastic resources for learning and practicing drawings in hands.
Digital Apps and Software:

- Procreate (iPad): Excellent for sketching with pressure sensitivity
- Adobe Photoshop/Fresco: Professional tools with extensive brushes
- Clip Studio Paint: Particularly good for figure drawing
- ArtRage: Simulates traditional media digitally
- Krita: Free, open-source option with good drawing tools
3D Reference Tools:
- Magic Poser: Poseable 3D hand models
- Handy Art Reference Tool: Specifically designed for hand references
- JustSketchMe: Web-based 3D pose reference
- Design Doll: Create custom poses with hands
Online Learning Platforms:
- Proko’s hand drawing courses (comprehensive anatomy focus)
- Ctrl+Paint (free digital painting tutorials)
- Drawabox (structured drawing curriculum)
- YouTube tutorials (free and varied difficulty levels)
Digital tools shouldn’t replace traditional observation and sketching, but they’re fantastic supplements. The ability to rotate a 3D hand model or quickly flip through dozens of reference photos makes practice more efficient.
Inspiration from Master Artists
Studying how master artists approached drawings in hands throughout history provides valuable insights and inspiration.
Artists Famous for Hand Work:
Leonardo da Vinci: His anatomical studies of hands remain unsurpassed. He dissected cadavers to understand the precise structure, creating drawings that are both scientifically accurate and artistically beautiful.

Albrecht Dürer: “Praying Hands” demonstrates his incredible ability to render detail and convey spiritual emotion through gesture alone.
Michelangelo: Whether in the Sistine Chapel or his sculptures, Michelangelo’s hands are powerful and expressive, conveying divine drama and human struggle.
John Singer Sargent: His loose, confident brushwork captured hands with remarkable economy – suggesting detail without overworking.
Egon Schiele: His expressive, angular approach to hands matched his emotional, psychological approach to figure work.
Andrew Loomis: His instructional books broke down hand construction in ways that remain relevant for contemporary artists.
Visit museum websites or art books to study these masters’ techniques. Notice how they simplified complex forms, where they placed emphasis, and how they used hands to enhance their compositions’ overall narrative.
Conclusion
Mastering drawings in hands is a journey that combines anatomical knowledge, keen observation, and consistent practice. By understanding the underlying structure, exploring diverse poses, and applying essential techniques like proportion, perspective, and shading, you can transform stiff renditions into dynamic, expressive works of art.
Remember that every artist struggles with hands initially. The difference between those who master them and those who avoid them is simply persistence. Break down complex poses into simple shapes, study anatomy without getting overwhelmed, practice regularly with intention, and use references without shame.
Your drawings in hands will improve dramatically with dedicated practice. Start with basic geometric forms, gradually add anatomical understanding, experiment with different poses and lighting, and don’t fear mistakes – they’re essential learning tools. Whether you’re creating realistic figure studies, expressive character illustrations, or anything in between, confident hand drawing will elevate your entire artistic practice.
Pick up your pencil today and start with something simple – perhaps your own hand resting on your desk. Apply the techniques you’ve learned here, and remember: every master artist once struggled exactly where you are now. The path to beautiful, expressive hand drawings begins with a single sketch. What will you draw?
FAQs: Drawings in Hands
Why are hands considered so difficult to draw?
Hands are complex due to their intricate bone structure (27 bones!), numerous muscles, flexible joints, and ability to form countless poses. They also convey subtle emotions, making accuracy crucial and challenging for artists. Additionally, we look at hands constantly in daily life, so our brains easily spot when something looks “off” in a drawing.
What’s the best way to start drawing hands if I’m a beginner?
Begin by understanding basic hand anatomy, then simplify the hand into basic geometric shapes like boxes and cylinders. Start with simple poses viewed from easy angles (like the side view) before attempting complex foreshortening. Use your own hand as a model and practice regularly – even 10 minutes daily makes a significant difference.
How can I make my hand drawings look more expressive?
To make drawings in hands more expressive, focus on exaggerating natural gestures slightly, paying attention to the tension in fingers or relaxed curves. Observe how hands convey emotion in real life, movies, and other media. The angle of the wrist, the curve of the fingers, and the overall gesture contribute significantly to expression beyond just facial features.
Should I draw the bones or muscles first?
It’s often best to start with simplified geometric shapes that represent the overall form, then consider the skeletal structure to establish correct proportions. Once you have the basic framework, add muscle volume and flesh. For finished drawings, you won’t draw actual bones and muscles, but understanding them helps you place surface details correctly.
How long does it take to get good at drawing hands?
This varies greatly by individual and practice consistency. With dedicated daily practice (30 minutes to an hour), most artists see significant improvement within 3-6 months. However, mastering hands is an ongoing journey – even professional artists continue refining their skills. The key is consistent, focused practice rather than a specific timeline.
What’s the biggest mistake beginners make when drawing hands?
The most common mistake is drawing “symbol hands” – generic hand shapes based on memory rather than observation. Other frequent errors include making all fingers the same length, ignoring the palm’s three-dimensional form, drawing fingers like tubes without joints, and avoiding practicing hands altogether because they seem too difficult.
Do I need to memorize all the hand bones and muscles?
No, you don’t need to memorize every anatomical detail. Understanding the general structure – the three groups of bones (carpals, metacarpals, phalanges) and major muscle groups (thenar, hypothenar) – provides enough foundation for good drawings in hands. Focus on understanding how the structure influences the surface forms you see.
How can I practice drawing hands without getting bored?
Mix up your practice sessions: alternate between quick gesture sketches and detailed studies, draw from different reference sources, try different media (pencil, pen, digital), draw hands doing specific activities (typing, holding objects, gesturing), and set specific challenges (like drawing 100 hands in a week). Variety keeps practice engaging.
Is it cheating to use reference photos or trace hands?
Using references is not cheating – it’s smart learning! Professional artists use references constantly. However, try to understand what you’re seeing rather than mindlessly copying. Tracing can be useful occasionally for understanding proportions, but shouldn’t be your primary practice method as it doesn’t build observational skills.
What’s the best lighting for drawing hands?
Side lighting (light coming from one side) is ideal for beginners because it creates clear shadows that reveal the three-dimensional form. This makes it easier to understand the hand’s structure. Avoid flat, even lighting or harsh overhead lighting when practicing, as these make forms harder to read and shade convincingly.

