
Are you struggling with painting reflections in watercolors? Do your reflections look more like smudges than realistic images? You’re not alone. Many watercolor artists grapple with this. Achieving the perfect reflection can be daunting, but with the right techniques and tips, you can transform your work from amateur to professional. Let’s dive in and explore how to paint watercolor reflections effectively.
Understanding the Basics of Watercolor Reflections
Before we get into the techniques, it’s crucial to understand what makes a reflection work in a painting. Reflections occur because of light bouncing off a surface, such as water. In watercolor, capturing this effect requires a good grasp of light, color, and the unique properties of the watercolor medium.
Key Elements of Reflections
- Symmetry: The reflected image is usually a mirror image of the object above the water.
- Distortion: Water isn’t a perfect mirror; ripples and waves distort the reflection.
- Color: Reflections often appear slightly darker and less saturated than the actual object.
Essential Techniques for Painting Watercolor Reflections
Wet-on-Wet Technique
The wet-on-wet technique is ideal for creating soft, blurred reflections, perfect for still water.
- Prepare Your Paper: Start by wetting the area where the reflection will be.
- Apply the Paint: While the paper is still wet, apply the watercolor. The paint will spread and create soft edges, mimicking the natural blur of reflections in water.
- Blend and Adjust: Use a clean, damp brush to blend and adjust the colors as needed.
Wet-on-Dry Technique
For sharper, more defined reflections, the wet-on-dry technique is your go-to method.
- Paint the Reflection: Once the initial layer is dry, paint the reflection directly onto the paper.
- Add Details: Use a smaller brush to add finer details and sharper edges.
Layering
Layering helps build depth and realism in reflections. It’s especially useful for complex scenes with multiple objects.
- Base Layer: Start with a light wash of color for the overall shape of the reflection.
- Middle Layers: Gradually add more layers, each time refining the details.
- Final Details: Add the final touches once the layers are dry.
Practical Tips for Realistic Watercolor Reflections
Observation is Key
Spend time observing real-life reflections. Notice how colors change, how light behaves, and how movement affects the image.
Use Reference Photos
Having a reference photo can be incredibly helpful. It provides a guide for colors, shapes, and overall composition.
Experiment with Colors
Watercolor is all about experimentation. Try different color combinations and techniques to see what works best for your scene.
Keep a Steady Hand
For precise reflections, a steady hand is essential. Practice brush control and take your time.
Step-by-Step Guide to Painting a Simple Reflection
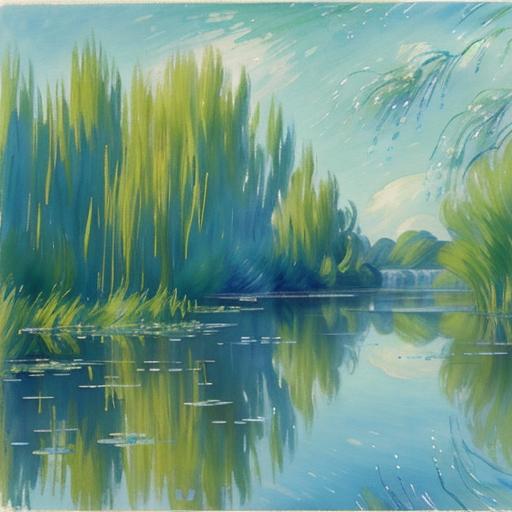
Let’s go through a simple exercise: painting a reflection of a tree in a lake.

- Sketch the Scene: Lightly sketch the tree and its reflection.
- Paint the Sky and Water: Use a wet-on-wet technique for the sky and water, blending them smoothly.
- Add the Tree: Once the background is dry, paint the tree using a wet-on-dry technique.
- Paint the Reflection: Mirror the tree’s shape in the water. Use slightly darker and less saturated colors.
- Blend the Reflection: Use a clean, damp brush to soften the edges of the reflection.
- Final Touches: Add any final details to enhance the realism.

Common Mistakes and How to Avoid Them
Overworking the Paper
Watercolor paper can only take so much water and paint before it starts to break down. Work efficiently and avoid going over the same area too many times.
Ignoring the Color Shift
Watercolors dry lighter than they appear when wet. Keep this in mind and adjust your colors accordingly.
Lack of Contrast
Reflections should have enough contrast to stand out but still blend naturally with the water. Strive for a balance.
Famous Watercolor Artists that feature Reflections
| Artist | Notable Painting | Gallery |
|---|---|---|
| JMW Turner | The Fighting Temeraire | National Gallery, London |
| John Singer Sargent | Boats, Venice | Museum of Fine Arts, Boston |
| Winslow Homer | The Gulf Stream | Metropolitan Museum of Art, New York |
| Vincent van Gogh | Boats on the Beach of Saintes-Maries-de-la-Mer | Van Gogh Museum, Amsterdam |
| James McNeill Whistler | Southend Pier | The Whistler House Museum and Study Center |
| Albrecht Dürer | Young Hare | Albertina, Vienna |
| Rhoda Holmes Nicholls | The Garden at St. Ives | National Gallery of Art, Washington, D.C. |
| Emil Nolde | The Sea | Nolde Stiftung, Seebüll |
Additional Notes:
- JMW Turner is celebrated for his atmospheric landscapes and seascapes, often capturing the interplay of light and water, making his works ideal for reflections.
- John Singer Sargent is known for his fluid brushwork and ability to capture the essence of light and movement in his watercolors, particularly in his Venetian scenes.
- Winslow Homer often depicted marine subjects, and his ability to convey the movement of water and light makes his works resonate with themes of reflection.
- Vincent van Gogh’s watercolors, though primarily studies, exhibit a vibrant use of color and form, particularly in coastal landscapes.
- James McNeill Whistler focused on simplicity and mood in his seascapes, effectively using reflections in his compositions.
- Albrecht Dürer was a pioneer in watercolor techniques, and his detailed studies often included reflections in nature.
- Rhoda Holmes Nicholls created vibrant landscapes and seascapes that captured the beauty of nature, often featuring reflective surfaces.
- Emil Nolde used bold colors and expressive forms to depict the sea, often emphasizing the reflections of light on water.
These artists have made significant contributions to the watercolor medium, and their works continue to be celebrated in major galleries worldwide.
Recommended Resources
- Books: “Watercolor Techniques for Artists and Illustrators” by DK and “The Watercolor Course You’ve Always Wanted” by Leslie Frontz.
The Wrap
Painting watercolor reflections can be challenging, but with the right techniques and plenty of practice, you can achieve stunning results. Remember to observe, experiment, and enjoy the process. Happy painting!

