
Looking for ways to spark your child’s creativity without breaking the bank? You’re in the right place! We’ve gathered 10 amazing DIY art projects for kids that work for kids of all ages and skill levels. Whether you’ve got a toddler who’s just starting to explore colors or a tween who’s ready for more complex crafts, these activities are perfect for rainy days, weekend fun, or anytime creativity strikes.
How to Use This Guide
Each project includes:
- Age recommendations
- Skill level variations (Beginner, Intermediate, Advanced)
- Basic and advanced techniques
- Tips for adapting to different abilities
Remember: Every child develops differently, so use these age ranges as general guidelines rather than strict rules. The most important thing is that your child has fun while creating!
Why DIY Art Projects Matter for Kids
Before we dive into the projects, let’s talk about why art activities are so important for children. Creative art projects help develop:
- Fine motor skills and hand-eye coordination
- Problem-solving abilities
- Self-expression and emotional awareness
- Basic color theory and artistic concepts
- Confidence in their creative abilities
Plus, these activities create perfect opportunities for family bonding and screen-free entertainment!
Easy Art Projects Your Kids Will Love
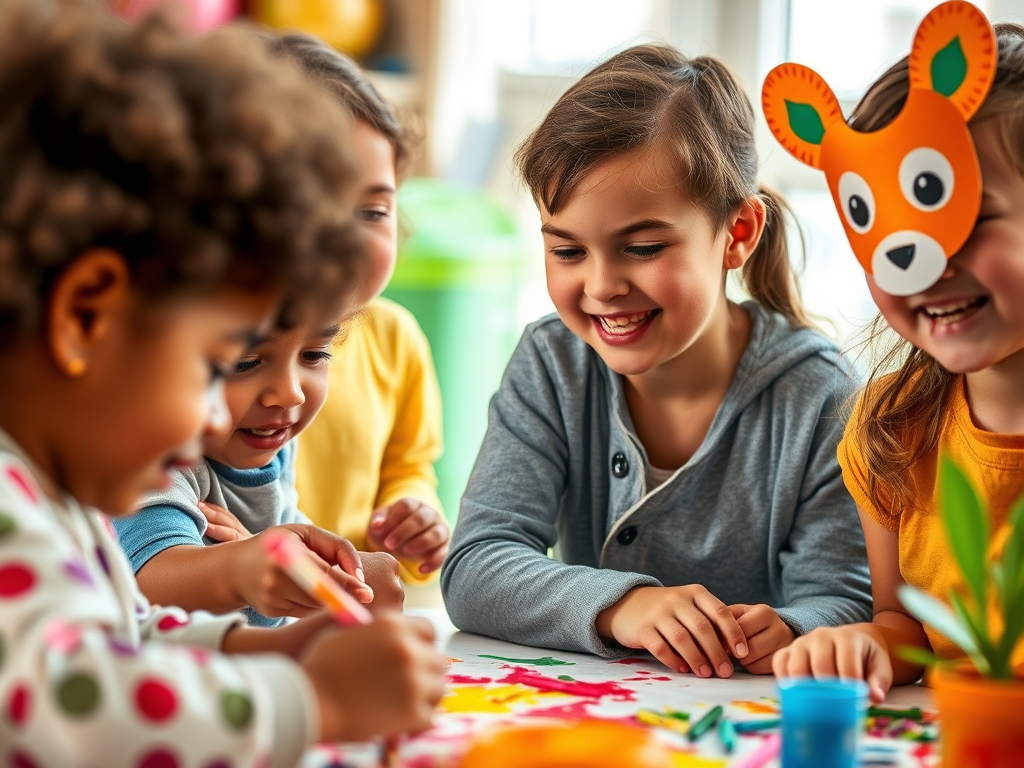
1. Paper Plate Animal Masks
Transform simple paper plates into wild and wonderful animal faces! This project combines creativity with imaginative play and works great for group activities.

Age Recommendations:
- Toddlers (2-3): Adult creates mask, child decorates with stickers
- Preschool (3-5): Simple masks with pre-cut pieces
- School Age (6-8): Basic mask creation with assistance
- Older Kids (9+): Complex designs and independent work
Skill Level Variations:
- Beginner: Simple face with basic shapes
- Intermediate: Add movable parts (mouth, ears)
- Advanced: Multi-plate designs, 3D elements
Materials Needed:
- Paper plates
- Washable paint or markers
- Colored construction paper
- Child-safe scissors
- School glue
- Craft stick (optional, for holding the mask)
Step-by-Step Instructions:
- Have your child paint the paper plate their chosen animal’s color.
- Cut ears, noses, and other features from construction paper.
- Arrange and glue the pieces to create your animal face.
- Add final details with markers (whiskers, spots, or stripes).
- Optional: Attach a craft stick to hold the mask.
Creative Ideas: Try making a roaring lion with a yellow plate and orange paper mane, a pink pig with floppy ears, or a white bunny with long ears!
2. Nature Art Exploration

Get creative outdoors with this eco-friendly project that connects kids with nature while making beautiful art! Perfect for nature lovers and budding environmentalists.
Age Recommendations:
- Toddlers (2-3): Simple leaf pressing and nature collecting
- Preschool (3-5): Basic nature collages with assistance
- School Age (6-8): Independent collage creation
- Older Kids (9+): Complex nature mandalas and patterns
Skill Level Variations:
- Beginner: Simple leaf and flower pressing
- Intermediate: Mixed media nature collages
- Advanced: 3D nature sculptures with mixed materials
Materials Needed:

- Sturdy cardboard or heavy paper
- School glue
- Natural materials (leaves, flowers, twigs, pebbles)
- Clear contact paper (optional, for preservation)
Step-by-Step Instructions:
- Go on a nature walk to collect materials.
- Plan out the design on your paper.
- Carefully glue items in place.
- Let dry completely.
- Cover with contact paper if you want to preserve the artwork.
Pro Tip: Turn this into a learning opportunity by identifying different types of leaves and discussing seasonal changes.
3. Homemade Play Clay Adventure

Turn your kitchen into a creative science lab! This engaging project teaches kids about measuring, mixing, and color theory while creating their own moldable masterpiece material.
Age Recommendations:
- Toddlers (2-3): Supervised play with pre-made clay
- Preschool (3-5): Help mix ingredients and choose colors
- School Age (6-8): Measure and mix with assistance
- Older Kids (9+): Create independently and experiment with recipes
Skill Level Variations:
- Beginner: Basic mixing and color creation
- Intermediate: Add glitter, scents, or textures
- Advanced: Create multi-colored marbled effects
Materials Needed:
- 2 cups all-purpose flour
- 1 cup table salt
- 1 cup warm water
- 2 tablespoons vegetable oil
- Food coloring
- Large mixing bowl
- Measuring cups
Step-by-Step Instructions:
- Mix flour and salt in a large bowl.
- Combine warm water and oil in a separate container.
- Slowly add the liquid mixture to the dry ingredients.
- Knead until smooth (about 5 minutes).
- Divide into portions for different colors.
- Add food coloring and knead until color is even.
Storage Tip: Keep your homemade play clay fresh in airtight containers or zip-lock bags. It can last up to 3 months when stored properly!
4. Rock Painting Adventure

Transform ordinary rocks into pocket-sized masterpieces! This versatile project teaches kids about color theory, patterns, and working with natural canvases.
Age Recommendations:
- Toddlers (2-3): Paint with single colors, adult supervision
- Preschool (3-5): Simple patterns and dot painting
- School Age (6-8): Basic character designs and scenes
- Older Kids (9+): Detailed paintings and mandala designs
Skill Level Variations:
- Beginner: Single color with simple patterns
- Intermediate: Two-tone designs and basic characters
- Advanced: Detailed scenes, mandalas, or story stones
Materials Needed:
- Smooth rocks (cleaned and dried)
- Acrylic paint
- Paint brushes in various sizes
- Clear sealant (optional)
- Paper plates for paint palettes
- Water cup for brush cleaning
Step-by-Step Instructions:
- Clean rocks thoroughly and let dry completely.
- Paint base colors on rocks.
- Let base coat dry (about 15 minutes).
- Add designs, patterns, or characters.
- Once dry, spray with clear sealant if desired.
Fun Ideas: Create pet rocks with faces, paint mini landscapes, or design garden markers with flowers!
5. Bubble Wrap Printing Magic

Discover the art of printmaking with this fun, textural project! Kids love the satisfying pop of bubble wrap while creating unique patterns and designs.
Age Recommendations:
- Toddlers (2-3): Simple stamp printing with assistance
- Preschool (3-5): Basic color printing with guidance
- School Age (6-8): Multi-color prints and patterns
- Older Kids (9+): Complex layered designs
Skill Level Variations:
- Beginner: Single color prints
- Intermediate: Multi-color patterns
- Advanced: Layered prints with mixed textures
Materials Needed:
- Bubble wrap pieces
- Tempera or acrylic paint
- Large paper
- Paint brushes or foam rollers
- Paper towels
- Rolling pin (optional)
Step-by-Step Instructions:
- Cut bubble wrap into manageable pieces.
- Apply paint evenly with a brush or roller.
- Press painted side onto paper.
- Gently rub or roll over the back.
- Carefully lift to reveal your print.
- Let dry before adding more layers.
Creative Tip: Try overlapping different colors to create new shades and patterns!
6. DIY Magical Kaleidoscope

Build your own color-changing wonder while exploring the science of light and reflection! This project combines art, science, and engineering in one exciting activity.
Age Recommendations:
- Toddlers (2-3): Use pre-made kaleidoscopes
- Preschool (3-5): Help with decoration and bead selection
- School Age (6-8): Assist with assembly
- Older Kids (9+): Independent construction and design
Skill Level Variations:
- Beginner: Basic tube with simple materials
- Intermediate: Add color wheels and special effects
- Advanced: Multiple chambers and themed designs
Materials Needed:
- Empty paper towel roll
- Mylar or aluminum foil
- Clear plastic (from packaging)
- Colorful beads or sequins
- Strong tape
- Scissors
- Decorative paper
Step-by-Step Instructions:
- Cut Mylar into three equal strips.
- Form strips into a triangular tube.
- Secure with tape.
- Insert triangle into the paper roll.
- Cover one end with clear plastic.
- Add beads or sequins.
- Seal end with tape.
- Decorate the outside of the tube.
Science Connection: Talk about how mirrors reflect light and create patterns!
7. Salt Dough Keepsakes

Create lasting memories with this classic craft material! Perfect for special occasions, holidays, or preserving those precious little handprints and footprints.
Age Recommendations:
- Toddlers (2-3): Hand and footprints with assistance
- Preschool (3-5): Simple shape cutting and decorating
- School Age (6-8): Independent shape creation
- Older Kids (9+): Complex designs and detailed work
Skill Level Variations:
- Beginner: Basic shapes and prints
- Intermediate: Textured designs and layered pieces
- Advanced: Intricate ornaments and 3D sculptures
Materials Needed:
- 1 cup salt
- 2 cups all-purpose flour
- 1 cup warm water
- Paint or markers
- Ribbon or string
- Cookie cutters
- Rolling pin
Step-by-Step Instructions:
- Mix salt and flour.
- Gradually add water while stirring.
- Knead until smooth (about 5 minutes).
- Roll out to 1/4 inch thickness.
- Cut shapes or press handprints.
- Make holes for hanging.
- Bake at 250°F for 2 hours.
- Cool completely before decorating.
Special Tip: Make holiday ornaments or birthday gifts that last for years!
8. Creative Handprint Gallery

Turn tiny hands into works of art! This classic activity creates precious keepsakes while teaching kids about shapes, colors, and creative transformation.
Age Recommendations:
- Toddlers (2-3): Simple handprints with washable paint
- Preschool (3-5): Basic animal designs from prints
- School Age (6-8): Complex scenes using handprints
- Older Kids (9+): Mixed media handprint art
Skill Level Variations:
- Beginner: Single print animals
- Intermediate: Multiple print scenes
- Advanced: Seasonal handprint art collections
Materials Needed:
- Washable paint
- Heavy paper
- Wet wipes for cleanup
- Markers or crayons
- Paper plate for paint
Step-by-Step Instructions:
- Pour paint onto a paper plate.
- Help the child press their hand into the paint.
- Make a handprint on paper.
- Clean hands immediately.
- Let the print dry completely.
- Add details to create animals or scenes.
Fun Ideas: Turn handprints into:
- Butterflies (2 prints)
- Peacocks (1 print with added tail)
- Fish (sideways print)
- Trees (upside-down print)
9. Cardboard Tube Construction

Turn recyclables into remarkable 3D art! This eco-friendly project teaches engineering concepts while encouraging creativity and spatial thinking.
Age Recommendations:
- Toddlers (2-3): Simple stacking and painting tubes
- Preschool (3-5): Basic construction with assistance
- School Age (6-8): Independent building projects
- Older Kids (9+): Complex architectural designs
Skill Level Variations:
- Beginner: Simple stacking and painting
- Intermediate: Basic sculptures and characters
- Advanced: Multi-tube structures with moving parts
Materials Needed:
- Cardboard tubes
- Paint or markers
- Construction paper
- Scissors
- White glue
- Decorative items
Step-by-Step Instructions:
- Collect various sizes of tubes.
- Paint or cover tubes with paper.
- Cut some tubes into rings or sections.
- Plan your structure.
- Glue pieces together.
- Add decorative elements.
- Let dry completely.
Building Ideas: Create robots, castles, animals, or abstract sculptures!
10. Magic Watercolor Reveal

Create enchanting artwork with this fascinating resist technique! Kids love watching their secret designs magically appear as they paint.
Age Recommendations:
- Toddlers (2-3): Adult draws design, child paints over
- Preschool (3-5): Simple shapes and letters
- School Age (6-8): Secret messages and basic scenes
- Older Kids (9+): Complex hidden pictures and designs
Skill Level Variations:
- Beginner: Simple shapes and patterns
- Intermediate: Hidden messages and basic scenes
- Advanced: Multi-layer reveals and detailed illustrations
Materials Needed:
- White crayon or oil pastel
- Watercolor paints
- Watercolor paper
- Paint brushes
- Water cup
- Paper towels
Step-by-Step Instructions:
- Prepare Your Secret Design (5-10 minutes)
- Place your watercolor paper on a flat, smooth surface
- Plan your design first – try simple shapes for beginners
- Hold your white crayon like you’re writing a letter
- Draw your design with strong, steady pressure
- Test your crayon marks by tilting the paper to see the waxy shine
- Perfect Your Wax Coverage (3-5 minutes)
- Go over your lines 2-3 times to ensure thick wax coverage
- Fill in larger areas using side-to-side strokes
- Check your work under good lighting – you should see a slight sheen
- Common designs: stars, hearts, names, or simple patterns
- Prepare Your Watercolors (2-3 minutes)
- Add a few drops of water to your chosen colors
- Test colors on scrap paper first
- Dark colors like purple, blue, or black work best
- Mix colors if desired, but avoid muddy combinations
- Apply the Watercolor Magic (5-10 minutes)
- Use a wide brush for even coverage
- Start from the top and work down
- Paint in smooth, overlapping strokes
- Don’t scrub – gentle strokes work better
- Cover every bit of the paper
- Watch the Reveal (1-2 minutes)
- Your design will start appearing immediately
- Keep adding paint until the whole design shows
- Look for any spots you missed
- Add a second layer of paint if needed
- Finishing Touches (30+ minutes)
- Let your artwork dry completely flat
- Avoid touching the wet paint
- Place on a level surface away from heat
- Consider framing your finished piece
Creative Ideas: Write secret messages, create night sky scenes, or make underwater adventures!
Making Art Time Special
To make these DIY art projects even more engaging:
- Create a dedicated art space where messes are okay.
- Display finished artwork prominently.
- Take photos of the creative process.
- Ask open-ended questions about their artistic choices.
- Encourage experimentation with different techniques.
Safety First!
Remember these important safety tips:
- Always supervise young children during art activities.
- Use child-safe scissors and non-toxic materials.
- Keep small items away from children under 3.
- Have cleaning supplies ready for quick cleanup.
- Protect work surfaces with newspaper or plastic.
Wrapping Up
These DIY art projects for kids offer more than just fun—they’re opportunities for learning, growth, and family bonding. Whether you’re making animal masks, exploring nature art, or creating with homemade play clay, each activity helps develop important skills while fostering creativity.
Remember, the goal isn’t perfection—it’s about the creative process and the joy of making something with their own hands. So gather your supplies, clear some space, and let the artistic adventure begin!
Have a great art project idea to share? Try these activities with your kids and let us know how it goes in the comments below!

