
When most people look at a box of Q-tips, they see bathroom supplies. When an artist looks at them, they see thousands of tiny paintbrushes ready to create a masterpiece. If you are looking for a way to create stunning art without spending years mastering brush strokes, this guide to Q-Tip Pointillism Landscape for Beginners is your new best friend.
Many beginners feel intimidated by expensive brushes and complex techniques like glazing or scumbling. But here is the secret: painting with cotton swabs (or cotton buds) levels the playing field. It allows you to create rich, textured “Impasto” effects that look like they belong in a gallery, all while using a tool you probably have in your medicine cabinet.

In this comprehensive guide, we aren’t just doing a kid’s craft. We are going to apply the sophisticated science of Neo-Impressionism using humble materials. You will learn how to mimic the great masters like Georges Seurat, understand the science of optical mixing, and complete a full lavender field landscape tutorial.
Here is what you will master in this guide:
- The History: How a 19th-century movement changed art forever.
- The Science: Why placing red dots next to yellow dots makes your eye see orange.
- The Tools: How to choose swabs that won’t leave “fuzzy” lint in your paint.
- The Technique: A step-by-step walkthrough to painting a vibrant landscape.
What is Pointillism? (A Brief History)
Before we dip our cotton into the paint, it helps to know whose shoulders we are standing on. Pointillism isn’t just “dot art”; it was a revolutionary scientific approach to painting.
The Fathers of Dots
In the late 1880s, the art world was dominated by Impressionists who painted with loose, sweeping brushstrokes to capture light. Enter Georges Seurat and Paul Signac. They wanted to bring more structure and science to this style. They developed a technique initially called “Divisionism” (dividing colors into their pure components), which later became known as Pointillism.
Seurat believed that physically mixing paints on a palette muddied the colors. Instead, he applied thousands of tiny distinct dots of pure color. He theorized that the viewer’s eye would mix these colors from a distance, resulting in a more vibrant and luminous image.
If you are interested in how art evolves, you might want to read about the evolution of art movements from Renaissance to Postmodernism, which explains where Pointillism fits in the grand timeline.
The Science: Optical Mixing vs. Physical Mixing
This is the core concept you need to understand for your Q-Tip Pointillism Landscape for Beginners.
- Physical Mixing: You take blue paint and yellow paint, mix them on a plate, and get green.
- Optical Mixing: You place a blue dot next to a yellow dot on the canvas. When you step back three feet, your eye “blends” them, and your brain registers the color green.
Because the colors aren’t physically mashed together, they retain their individual intensity. This creates a “vibrating” effect that makes the painting feel alive. This concept is deeply rooted in color theory basics, which is essential for any aspiring artist.
Famous Examples
The most famous example of this technique is Georges Seurat’s A Sunday Afternoon on the Island of La Grande Jatte.
- Time to create: 2 years (1884–1886).
- Size: Approx 7 x 10 feet.
- Estimated Dots: Over 220,000.
While Seurat used brushes, we will use Q-tips to achieve a similar effect much faster!

Essential Supplies for Under $30
One of the best things about Q-Tip Pointillism Landscape for Beginners is the low barrier to entry. You do not need sable hair brushes or expensive oils.
Here is a breakdown of what you need. Real data shows you can start this hobby for the price of a takeout dinner.
Cost of Entry Breakdown
| Item | Est. Cost | Notes |
|---|---|---|
| Cotton Swabs (500 ct) | $4.00 | Avoid the cheapest generic brands (see below). |
| Canvas Panels (10-pack) | $12.00 | 8×10 panels are perfect for starting. |
| Acrylic Paint Set | $12.00 | Basic student grade (12 colors). |
| Paper Plates | $1.00 | Use as a disposable palette. |
| Rubber Bands | $0.50 | For bundling swabs. |
| Total | ~$29.50 | Prices may vary by region. |

The “Shedding” Factor: Choosing Your Swabs
This is the number one complaint in acrylic painting for beginners: “Why is there cotton fuzz in my paint?”
Standard Q-tips are designed to be soft for ears. Soft means loose cotton fibers. When you push these into sticky acrylic paint, the fibers pull away and stick to your canvas.
Pro Tips for Tools:
- Brand Matters: Name-brand Q-tips tend to be wound tighter than dollar-store generics.
- Cosmetic Swabs: Look for “pointed” or “precision” cosmetic cotton swabs in the beauty aisle. These are wound very tightly and shed much less.
- Hobby Swabs: For the ultimate experience, “Mr. Hobby” or model-painting cotton buds are designed specifically for paint application and will not shed.
Why Acrylics?
You might wonder if you can use watercolors. Generally, no. Watercolors are too thin and will soak into the cotton, making a soggy mess. You need Acrylic Paint. It has a thick consistency (viscosity) that sits on top of the cotton bud, allowing you to stamp a perfect circle. Heavy Body acrylics are best for creating texture.
If you are curious about other paints, check out this guide on what is gouache, which is an opaque watercolor that can work for this technique, though acrylic is still preferred for beginners.
Surfaces
Canvas panels are ideal. They are rigid and won’t warp when you tap them repeatedly. Paper tends to ripple with moisture. If you must use paper, choose a heavy mixed-media or watercolor paper (300gsm). You can learn more about acrylic painting surfaces to find what suits you best.
Core Techniques for Cotton Swab Painting

Before tackling the landscape, let’s practice the physical techniques. Painting with a cotton swab is different from a brush; it is more like stamping than stroking.
1. The Single Dot (Stippling)
Dip the swab into the paint—do not overload it. Press it gently onto the canvas and lift straight up.
- Light Touch: Creates a small, neat circle.
- Heavy Press: Creates a larger circle with a “rim” of paint (like a crater), adding texture.
2. The Bundle Method
This is a game-changer for painting trees and bushes.
- Take 7 to 9 Q-tips.
- Bunch them together in a circle.
- Wrap a rubber band tightly around the middle.
- Result: Now, one stamp creates a cluster of leaves instantly. This is perfect for the “wet-on-wet” foliage technique.

3. Color Blending

- Wet-on-Wet: Stamp a blue dot. While it is still wet, stamp a red dot slightly overlapping it. The paints will physically mix on the canvas to create purple. This can get muddy if you aren’t careful.
- Wet-on-Dry: Let the blue dots dry completely (acrylics dry fast, usually 10-15 minutes). Then, stamp red dots in the empty spaces between them. This creates the optical mixing effect we discussed earlier.
For more on blending, read our color mixing primer.
4. The Drag
While Pointillism focuses on dots, you can also drag the Q-tip sideways to create lines. This is useful for painting grass blades, tree trunks, or the horizon line.

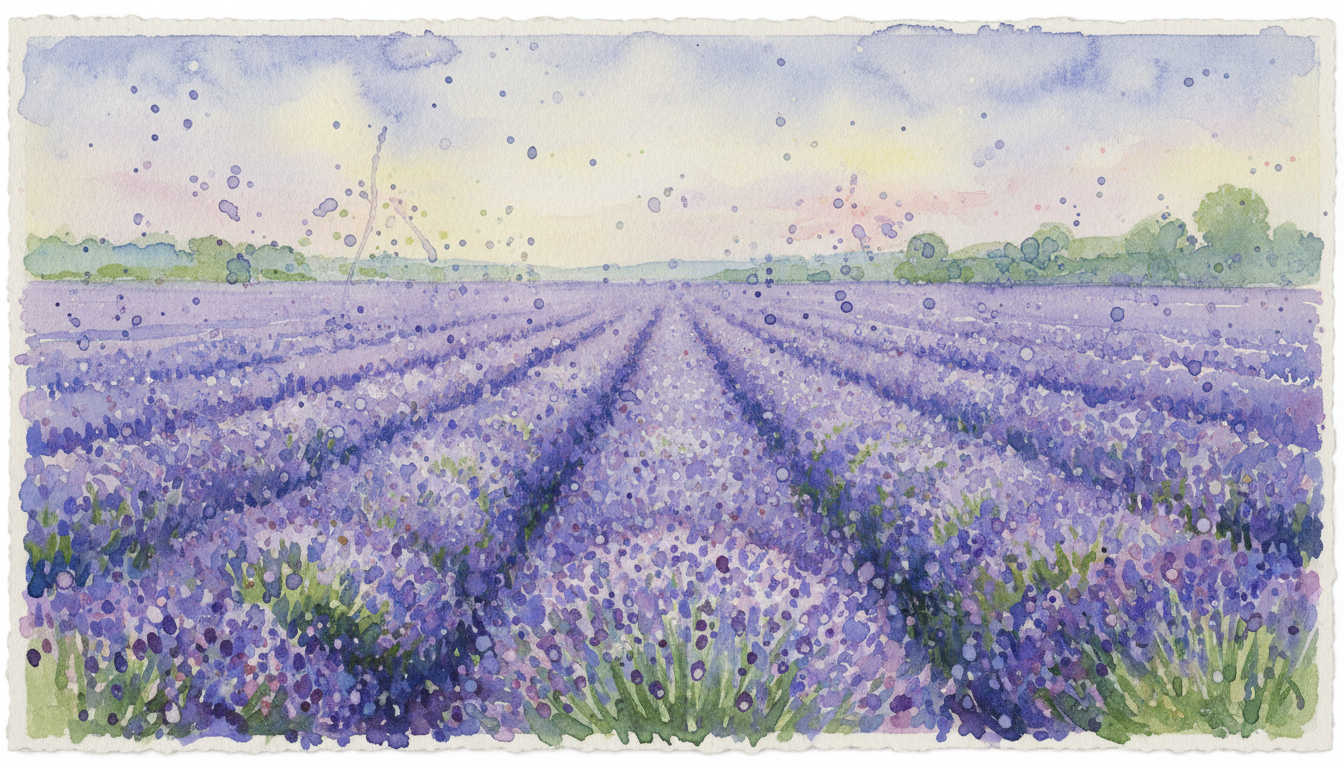
Step-by-Step Tutorial: Painting a Lavender Field Landscape
Now, let’s apply everything to a Q-Tip Pointillism Landscape for Beginners. We will paint a classic scene: a field of lavender leading up to green hills and a blue sky.
Step 1: Preparation & Sky

Squeeze out White, Blue (Phthalo or Ultramarine), and a tiny bit of Red onto your palette.
- The Gradient: We want the sky to be darker at the top and lighter near the horizon.
- Top Sky: Dip a clean Q-tip (or a bundle of 3) into the Blue. Stamp firmly across the top of the canvas.
- Mid Sky: Mix a little White into your Blue. Stamp below the dark blue area.
- Horizon: Use almost pure White with a speck of Blue. Stamp near the middle of the canvas.
- Blending: While the paint is wet, use a clean Q-tip to lightly rub the boundary lines between the blues to soften the transition. This is one area where we break the “dots only” rule for a smoother sky.
Tip: For cloud formations, check out how to paint clouds with acrylics for beginners.
Step 2: The Midground (Hills & Grass)

Squeeze out Sap Green (or any dark green) and Yellow.
Highlights: Without cleaning the bundle, dip it into the Yellow. Stamp lightly over the tops of the hills where the sunlight would hit. The yellow will mix with the wet green to create a lime/chartreuse highlight.
Outline: Use a single Q-tip with dark green to lightly dot the outline of rolling hills against your sky.
The Bundle Technique: Create a bundle of 5-7 Q-tips. Dip them into the Dark Green. Stamp the hills to fill them in.
Step 3: The Foreground (Lavender Flowers)

This is where the magic happens. You need Purple (Dioxazine Purple is great), White, and Magenta.
- Stalks: Using a single Q-tip and Dark Green, drag short vertical lines starting from the bottom of the canvas up toward the hills. These are your flower stems.
- Shadows: Dip a single Q-tip in pure Purple. Dot along the top 2/3 of your green stems. Keep the dots clustered in a cone shape (wider at the bottom of the flower head, narrow at the top).
- Mid-Tones: Mix Purple with a little White (or use a Lavender tube color). Dot this over the dark purple, covering about 50% of the previous dots.
- Highlights: Dip a fresh Q-tip into White mixed with a tiny touch of Magenta. Place just 2-3 dots on the very “sunny” side of each flower cone (usually the top right or top left).
This layering creates a 3D effect. The dark purple acts as the shadow, and the white acts as the sun hitting the petals.

Step 4: Adding Details
Use a “Precision” swab or a toothpick for this part if you have one.
- Sun: Place a solid white or bright yellow circle in the sky.
- Birds: Use black paint and a dragged Q-tip to make tiny “V” shapes in the distance.
- Foreground Grass: Drag some bright green lines at the very bottom of the canvas to look like blades of grass close to the viewer.
Troubleshooting Common Beginner Mistakes
Even with a guide, things can go wrong. Here is how to fix the most common issues in Q-Tip Pointillism.
1. The “Fuzzy” Problem (Cotton Shedding)
- Symptom: Your painting looks hairy.
- Cause: The paint is too sticky (tacky), pulling fibers off cheap swabs.
- Fix: Before dipping in paint, lightly dip your Q-tip in water and smooth it with your fingers. This lays the fibers down. Alternatively, switch to high-quality cosmetic swabs. If fibers are already on the canvas, wait for the paint to dry and use a pair of tweezers to pluck them off.
2. Muddy Colors

- Symptom: Your vibrant lavender field looks brown or gray.
- Cause: You dotted complimentary colors (like Purple and Yellow) while they were both wet.
- Fix: Patience! Let the first layer dry for 15-20 minutes. Wet-on-Dry is the secret to clean Pointillism. If you are struggling with color mixing, review a color mixing chart printable.
3. Flat Dots
- Symptom: The dots look like stains rather than textured bumps.
- Cause: Your paint is too thin (fluid acrylics) or you added too much water.
- Fix: Use Heavy Body Acrylics straight from the tube. Do not add water. Scoop a generous amount onto the Q-tip so you are depositing a physical mound of paint. This technique mimics Impasto—a thick application of paint that makes brushstrokes (or dot strokes) visible.
Safety & Cleanup
Art is fun, but safety comes first.
- Skin Safety: Acrylic paint is generally non-toxic, but it is not designed for skin. It has an alkaline pH (often 8-9+) which can irritate sensitive skin. Do not use this technique for face painting; use proper cosmetic-grade face paints instead.
- Disposal: Never flush Q-tips down the toilet. They clog pipes instantly.
- Palette Cleanup: If you use a paper plate, just let it dry and toss it. If you use a plastic palette, peel the acrylic off once it is dry.
- Environmental Tip: To reduce waste, use both ends of the Q-tip!
Conclusion & Next Steps
Congratulations! You have just completed a Q-Tip Pointillism Landscape for Beginners. You have learned the history of Seurat, the science of optical mixing, and a practical technique to create textured art for under $30.
This technique is incredibly versatile. Once you master the lavender field, try changing the colors to represent different seasons:
- Spring: Pink and White dots for Cherry Blossoms.
- Autumn: Orange, Red, and Gold dots for Fall Maples.
- Winter: Blue and White dots on black paper for a snowy night.
When you are ready to display your work, remember that textured paintings often look best displayed without glass (or with a spacer) so the texture isn’t flattened. Check out our guide on canvas prints for your home for ideas on how to hang your new masterpiece.
Don’t let the simplicity of the tool fool you. Some of the most famous paintings in history were built on simple principles executed with patience. So grab a handful of cotton swabs and start dotting!

Frequently Asked Questions (FAQ)
Q: Can I use watercolors for Q-tip pointillism?
A: It is not recommended. Watercolors are too liquid and will be absorbed into the cotton immediately, making it hard to get a defined dot. Gouache or Acrylics are much better suited for this.
Q: How do I prevent cotton swabs from shedding in paint?
A: Use tightly wound cosmetic swabs or “model hobby” swabs. If using standard ones, dampen them slightly with water and smooth the fibers down before dipping them in paint.
Q: Why do my acrylic colors look muddy?
A: This happens when you mix wet complimentary colors (like red and green) on the canvas. Allow the bottom layer to dry completely (15-20 mins) before dotting a new color on top to keep them vibrant.
Q: What is the difference between Pointillism and Stippling?
A: While similar, Pointillism specifically refers to the use of color theory (optical mixing) to create images. Stippling is a broader term often used in drawing (pen and ink) to create shading and depth using single-color dots.
Q: Is this a good project for kids?
A: Absolutely! It is excellent for fine motor skills. However, this guide focuses on the “adult” application to create high-quality textured art, proving it’s not just for kids.
Q: How long does the thick paint take to dry?
A: Thin acrylic layers dry in 10-20 minutes. However, the thick “Impasto” dots created by Q-tips may take 1-2 hours to be touch-dry and up to 24 hours to fully cure.

