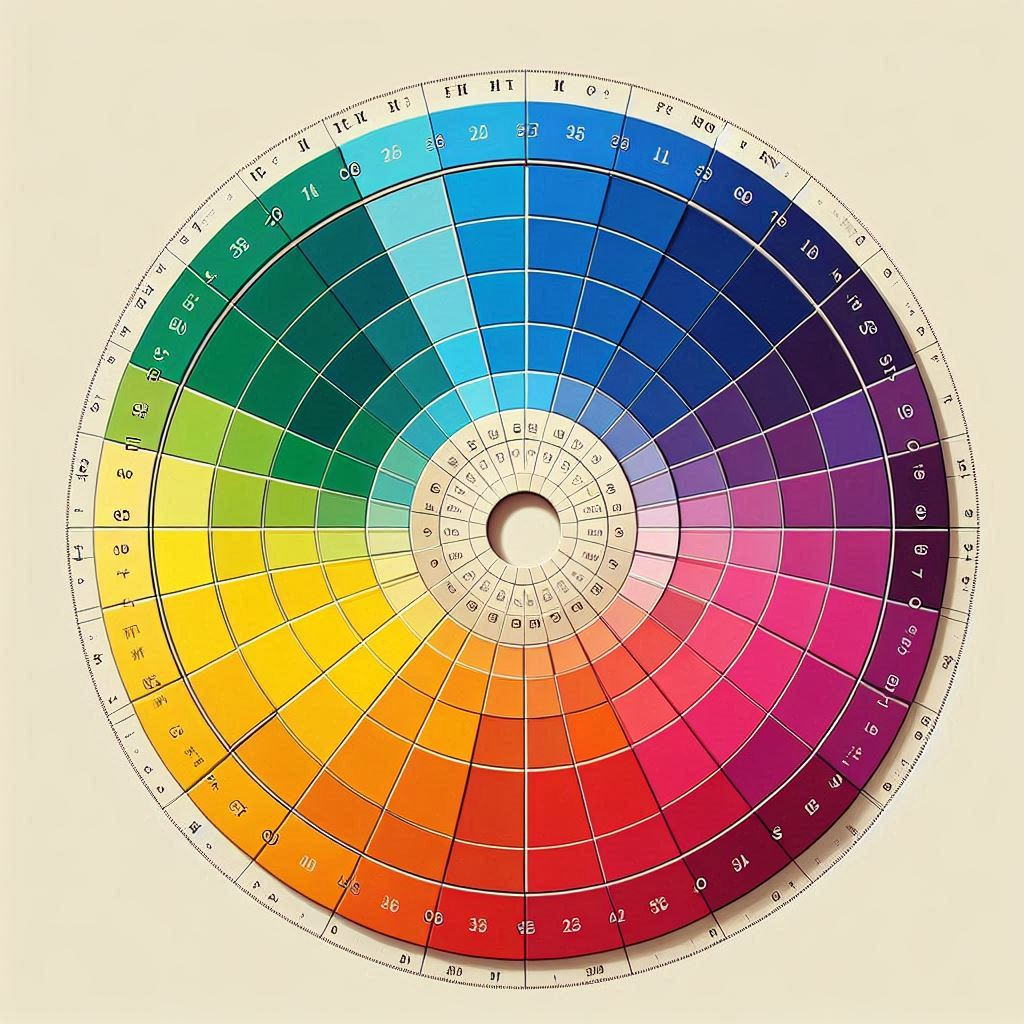
The background of a painting often determines whether your artwork captivates viewers or leaves them indifferent. While many artists focus primarily on their main subject, the background serves as the foundation that can make or break the entire composition. Understanding how to paint backgrounds will elevate your artistic practice and create more professional, engaging paintings.
Key Points
- Atmospheric perspective creates depth by making distant objects lighter, cooler, and less detailed
- Value relationships between background and subject determine visual impact and separation
- Color temperature plays a crucial role in creating mood and spatial depth
- Soft edges in backgrounds help maintain focus on the main subject
- Gradation techniques transform flat surfaces into convincing three-dimensional spaces
- Working from general to specific prevents overworking subordinate areas
- Complementary color schemes create natural harmony while providing adequate contrast
- Common mistakes include making backgrounds too busy, detailed, or saturated
- Edge quality at background-subject transitions requires careful attention for realism
Understanding the Role of Backgrounds in Painting
A well-executed background does far more than simply fill empty space behind your subject. It establishes the mood and atmosphere of your piece, provides visual context, and guides the viewer’s eye throughout the composition. The background can suggest time of day, weather conditions, or emotional undertones that support your artistic vision.
Consider how the soft, hazy backgrounds in Impressionist paintings create a sense of light and movement, or how the dramatic dark backgrounds in Baroque portraits make subjects appear to emerge from shadow. These artists understood that backgrounds are active participants in storytelling, not passive elements to be rushed through or ignored. Learning about different painting genres can help you understand how backgrounds function across various artistic styles.
Basics: How to Paint Backgrounds
How to Paint a Stunning Background
Follow our step-by-step guide to create beautiful, layered backgrounds for your artwork. Scroll through the timeline to see the process unfold.
Prep & Prime
Start with a clean surface. Apply a layer of gesso or primer to create a smooth, even base for your paint.
Apply Base Coat
Block in the main color of your background. This establishes the overall mood and tone of the piece.
Add Texture/Gradient
Introduce visual interest. Use sponges, cloths, or different brush strokes to create texture or a smooth color gradient.
Layer for Depth
Build up layers of color, moving from general shapes to more specific details. Add shadows and highlights.
Details & Finish
Add the final touches. This could be small highlights, subtle color shifts, or a finishing varnish to protect your work.
Essential Techniques for Background Painting
Atmospheric Perspective

Atmospheric perspective is fundamental to creating believable backgrounds that recede convincingly into space. Objects in the distance appear lighter, cooler in color temperature, and less detailed than those in the foreground. This natural phenomenon occurs because atmospheric particles scatter light and reduce contrast over distance. Understanding color theory fundamentals will help you apply these principles more effectively.
To achieve atmospheric perspective, gradually reduce the intensity of your colors as elements move toward the background. Warm colors should become cooler, and sharp edges should soften. Details should become increasingly simplified, with the most distant elements appearing as simple shapes rather than carefully rendered forms.
Gradation and Blending

Smooth gradations create the illusion of infinite space and can transform a flat surface into a convincing environment. Whether you’re painting a sunset sky or a misty landscape, mastering gradation techniques will give your backgrounds professional polish.
For oil and acrylic painters, work while the paint is still wet to achieve seamless blends. Use a large, soft brush or blending tool to gently merge colors together. Digital artists can use gradient tools and soft brushes with low opacity to build up subtle transitions. Watercolor artists should work quickly while the paper is damp, allowing colors to flow naturally into one another.
Value Relationships
The relationship between light and dark values in your background directly affects how your main subject reads. A light subject typically requires a darker background to create contrast and visual separation, while a dark subject often benefits from a lighter backdrop.
Consider painting your background slightly darker or lighter than your initial assessment. This approach ensures your subject will have adequate contrast to stand out effectively. Remember that you can always adjust values as you develop the painting, but establishing strong foundational relationships early will guide your decision-making throughout the process. Master the complete guide to light and shadow to better understand these crucial relationships.
Color Strategies for Effective Backgrounds
Complementary Color Schemes
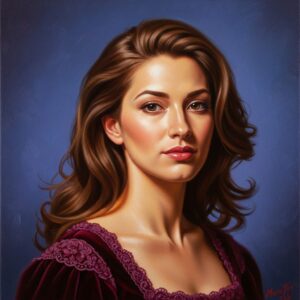
Using colors that complement your main subject creates natural harmony while providing enough contrast to make elements distinct. If your subject features warm oranges and reds, consider cool blues and purples for the background. This complementary relationship creates visual vibration that energizes the entire composition without competing for attention.
Analogous Color Harmonies
Analogous color schemes use colors that sit adjacent to each other on the color wheel, creating harmonious, unified backgrounds. This approach works particularly well for atmospheric effects like fog, mist, or twilight scenes where subtle color variations create depth without dramatic contrast.
Temperature Variations
Color temperature plays a crucial role in background effectiveness. Generally, warm colors advance while cool colors recede, making cool backgrounds natural choices for creating depth. However, don’t limit yourself to this rule exclusively. Warm backgrounds can create dramatic effects when used purposefully, particularly in portrait work or when creating specific moods. Understanding how to create mood with color choices will enhance your background decisions.
Practical Application Methods
Working from General to Specific
Begin your background with broad, simple shapes and gradually add complexity only where necessary. This approach prevents overworking areas that should remain subordinate to your main subject. Start with large washes or broad brush strokes to establish the overall color and value pattern before considering any details. For beginners, reviewing essential painting composition techniques can provide valuable foundation knowledge.
Maintaining Soft Edges
Backgrounds typically benefit from softer edges than foreground elements. This doesn’t mean everything should be blurry, but rather that transitions should feel natural and unforced. Hard edges draw attention, so reserve them for areas where you want to create emphasis or guide the viewer’s eye.
Balancing Detail and Simplicity
Resist the temptation to render every element in your background with equal detail. Instead, suggest forms through color and value changes rather than defining every edge and texture. This selective focus keeps attention on your main subject while still providing an engaging environment.
Common Background Painting Mistakes
Many artists fall into the trap of treating backgrounds as afterthoughts, resulting in compositions that feel disconnected or unfinished. Avoid making backgrounds too busy or detailed, which can compete with your main subject for attention. Similarly, don’t make them so simple that they appear unfinished or lack visual interest.
Another frequent mistake involves using colors that are too saturated or intense in background areas. Remember that atmospheric perspective naturally reduces color intensity with distance, so backgrounds should generally feature more muted tones than foreground elements. Learning to avoid common painting mistakes beginners make will help you create more professional-looking backgrounds.
Finishing and Refinement
As you near completion, step back frequently to evaluate how your background supports the overall composition. Look for areas where adjustments might improve the relationship between foreground and background elements. Sometimes a slight darkening or lightening of background values can dramatically improve how your subject reads.

Consider the edges where your background meets your main subject. These transitions often require careful attention to ensure they feel natural and support the illusion of three-dimensional space. Soft, lost edges can help integrate subjects into their environments, while sharp, found edges can create separation and emphasis. Understanding techniques for creating depth in paintings will help you master these subtle but crucial details.
The background of your painting provides the stage upon which your main subject performs. By approaching background painting with intention and understanding these fundamental principles, you’ll create artwork that feels cohesive, professional, and engaging. Remember that every brushstroke in your background should serve the overall vision of your piece, supporting rather than competing with your artistic goals. For additional inspiration, explore easy canvas art ideas to practice these background techniques.
Frequently Asked Questions
How do I paint a background without overpowering my main subject?
Keep backgrounds simpler in detail, softer in edges, and more muted in color intensity than your main subject. Use atmospheric perspective principles to push background elements visually into the distance, and ensure your value contrasts favor the subject.
What colors should I use for backgrounds?
Choose colors that complement your main subject using color theory principles. Cool colors typically recede and work well for backgrounds, while warm colors advance. Consider the mood you want to create and use temperature variations accordingly.
How do I fix a background that’s too busy?
Simplify by softening hard edges, reducing detail, and muting color intensity. You can glaze over areas with a neutral tone or use blending techniques to merge overly distinct elements into more unified shapes.
Should I paint the background first or last?
Most artists work background to foreground, establishing the overall environment before adding the main subject. This approach helps with color harmony and prevents the background from competing with your subject for attention.
How do I create depth in my backgrounds?
Use atmospheric perspective by making distant objects lighter, cooler, and less detailed. Employ gradation techniques, vary your brushstrokes from loose in the background to tight in the foreground, and carefully control your value relationships.
What’s the difference between a soft background and a blurry background?
A soft background maintains form and structure while having gentle transitions and muted details. A blurry background lacks definition and can appear unfocused. Aim for softness that still suggests form rather than complete blur.
How do I choose the right brush for background work?
Use larger, softer brushes for backgrounds to achieve smooth blends and avoid overworking. Flat brushes work well for broad areas, while soft rounds are excellent for gradations and atmospheric effects.
Can I use the same background technique for all painting mediums?
While the principles remain consistent, execution varies by medium. Watercolors require working wet-on-wet for smooth blends, oils allow extended working time for seamless transitions, and acrylics need quick work or retarding mediums to prevent fast drying.
Resources
- Color Theory Fundamentals Guide – Master the science behind effective color relationships
- Atmospheric Perspective Tutorial – Learn depth creation techniques
- Brush Techniques Guide – Master different brushstroke applications
- Value Studies Resource – External resource for understanding values
- Color Mixing Charts – Comprehensive color mixing reference
- Digital Background Tutorials – Video tutorials for digital artists
- Traditional Media Techniques – Community resource for traditional painting methods

