
New to the vibrant world of acrylics? It’s an exciting medium, full of potential for bright colours and bold textures. But many beginners quickly run into a common, frustrating problem: the paint dries too fast! This can make creating smooth, beautiful blends seem impossible. If you’ve ever tried to create a soft sunset gradient only to end up with harsh, streaky lines, you’re not alone. The good news is that with a few simple tricks and techniques, you can master this skill. This guide will teach you how to blend acrylic paint on canvas for beginners, transforming that frustration into a fun and rewarding part of your artistic journey.

Key Point Summary
- Work Quickly & In Sections: Acrylic paint’s fast-drying nature is your biggest challenge. Prepare your colours beforehand and work on small, manageable areas of your canvas at a time.
- Keep Your Paint Wet: The secret to smooth blending is moisture. Use a spray bottle (mister) to lightly mist your canvas and paints on the palette to extend their working time.
- Use the Right Tools: Soft-bristled synthetic brushes are ideal for blending as they don’t leave harsh lines. A stay-wet palette is also a game-changer for keeping your colours usable for longer.
- Master Key Techniques: The two primary methods are “wet-on-wet” (applying wet paint onto a wet layer) and “wet-on-dry” (applying thinned, wet paint over a dry layer, also known as glazing).
- Additives Are Your Friends: Don’t be afraid to use acrylic mediums like a “retarder” or “glazing liquid.” These are designed specifically to slow down the drying time and make blending much easier.
Understanding the Acrylic Blending Challenge
So, why is blending acrylics so tricky compared to, say, oils? It comes down to science. Acrylic paint is a water-based polymer emulsion. When the water evaporates, the polymer particles fuse together into a durable, plastic-like film. This process happens very quickly, especially in a warm, dry room. Once that paint starts to dry, trying to blend it often results in lifting the colour underneath, creating a muddy, uneven mess.
The key is to control the drying time. By keeping the paint workable for longer, you give yourself the window you need to create those seamless transitions from one colour to another. For a complete overview of getting started, our Mastering Acrylic Painting: A Complete Guide for Beginners is an excellent resource.
“Creativity takes courage.”
Henri Matisse
This quote is a perfect reminder that trying new techniques, even if they seem challenging at first, is a brave and essential part of growing as an artist.
Essential Supplies for Effortless Blending

Having the right tools can make all the difference. While you don’t need the most expensive gear, a few specific items will make your blending journey much smoother.
| Tool | Why It’s Important for Blending | Pro-Tip |
| Soft Synthetic Brushes | Stiff, bristle brushes can leave harsh lines. Soft, flexible brushes (like Taklon) allow for smoother, more delicate transitions between colours. A flat or filbert brush is great for broad areas, while a small, soft mop brush can be used dry to gently feather colours together. | Have several brushes on hand: one for each main colour and a separate, clean, dry brush just for blending the transition line. |
| Stay-Wet Palette | This is a special palette with a sponge and membrane paper that keeps your acrylic paints moist and usable for hours, or even days. It’s a true game-changer. | You can make a DIY version! Use a shallow container with a lid, place a damp paper towel or sponge in the bottom, and lay a sheet of parchment paper over the top to place your paints on. |
| Water Mister/Spray Bottle | A fine mist of water is your best friend. Lightly spray your canvas before you start and periodically mist your paints on the palette to keep them from skinning over. | Look for a bottle that produces a very fine, gentle mist rather than a jet stream to avoid creating large water drips on your canvas. |
| Acrylic Mediums | These are additives you mix with your paint. Glazing Liquid thins the paint while keeping the pigment intact, and Slow-Dri Medium or Retarder does exactly what the name says—it slows the drying time. | Start with a small amount of medium (around 1 part medium to 10 parts paint) and add more if needed. Using too much can make the paint feel sticky. |
For more guidance on selecting the right tools, check out our guides on The Best Paint Brushes for Beginners and How to Choose the Right Canvas for Your Art.
Core Techniques: How to Blend Acrylics Like a Pro
Now for the fun part! Let’s get into the practical techniques. The two most common methods are wet-on-wet and wet-on-dry.
1. The Wet-on-Wet Technique

This is the most direct method and is great for creating soft, diffused backgrounds and gradients, like skies or water.
- Step 1: Prepare Your Canvas. Lightly mist the area of the canvas you’ll be working on with your spray bottle. It should have a slight sheen, but not be dripping wet.
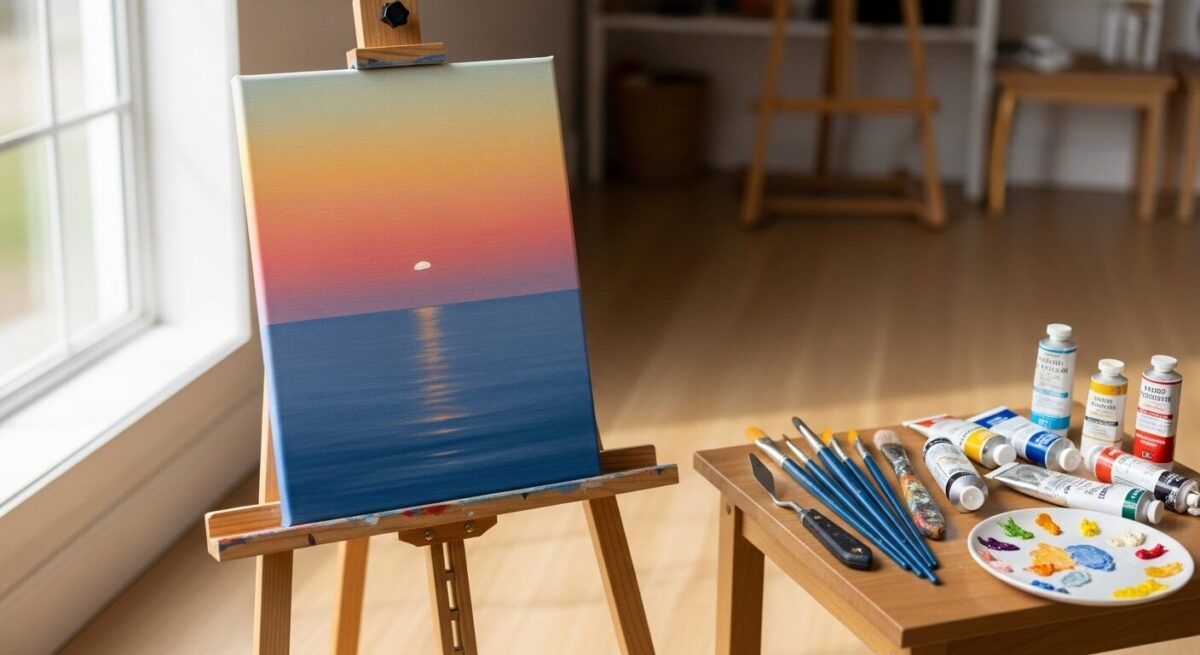
- Step 2: Lay Down Your Base Colour. Quickly apply your first colour to its section of the canvas. For a sunset, this might be the yellow at the horizon.
- Step 3: Add Your Second Colour. While the first colour is still very wet, apply your next colour (e.g., orange) right beside it, slightly overlapping the edge.
- Step 4: Blend the Seam. Take a clean, slightly damp brush and gently work it back and forth along the line where the two colours meet. Use light, feathery strokes. Wipe excess paint from your blending brush often to avoid creating a single muddy colour. Work quickly before the paint begins to dry!
2. The Wet-on-Dry Technique (Glazing)
This technique involves layering thin, transparent washes of colour over a layer of dry paint. It offers more control than wet-on-wet and is perfect for creating subtle shifts in colour and value.
- Step 1: Let Your Base Layer Dry. This is crucial. Your underlying colour must be completely dry to the touch.
- Step 2: Mix Your Glaze. On your palette, mix a small amount of your second colour with a glazing medium or a bit of water. You’re aiming for a translucent, “see-through” consistency, like stained glass. Mastering this is part of understanding colour mixing.
- Step 3: Apply the Glaze. With a soft brush, apply this glaze over the dry paint. You can start at one end and feather it out, or cover an entire area to subtly shift its hue.
- Step 4: Repeat and Build. Let the glaze dry completely, then add another layer if you want to deepen the colour or smooth the transition even more. This layering process is what creates a beautiful sense of depth.

Watch and Learn: Blending for Beginners
Sometimes, seeing is believing. This video provides a fantastic visual demonstration of simple blending techniques that are perfect for beginners.
Common Blending Mistakes and How to Fix Them
Every artist makes mistakes; it’s part of the process! The trick is knowing how to fix them. If you’ve made a mistake, you can learn more from our article on Fixing Painting Mistakes.

- Muddy Colours: This usually happens from over-blending or trying to blend colours that are directly opposite on the colour wheel (like purple and yellow).
- The Fix: Work with colours that are next to each other on the colour wheel (analogous colours). Also, wipe your blending brush clean frequently as you work. If an area is already muddy, it’s often best to let it dry completely and paint over it.
- Visible, Harsh Brushstrokes: This is often caused by using a brush that’s too stiff, not using enough paint, or the paint drying too quickly.
- The Fix: Use a soft-bristled brush and ensure your paint is fluid enough (add a touch of water or medium). Using a clean, dry, soft mop brush to gently “fluff” the transition line can also soften hard edges.
- Paint Lifting Off the Canvas: This is a tell-tale sign that you’re trying to blend paint that is already partially dry.
- The Fix: Stop! Let the area dry completely. You can then go back in with the wet-on-dry glazing technique to smooth the transition. Remember to mist your canvas more frequently to prevent this from happening in the first place. You can read about more common painting mistakes beginners make to stay ahead of the curve.
Learning how to blend acrylic paint on canvas is a fundamental skill that will open up a new world of possibilities in your art. It takes a bit of practice, but don’t be discouraged. Embrace the process, experiment with these techniques, and be patient with yourself. Soon, you’ll be creating smooth, beautiful gradients and transitions with confidence.

FAQs: How to Blend Acrylic Paint on Canvas for Beginners
1. How do you blend acrylics for beginners? The easiest way is to use the “wet-on-wet” technique. Lightly mist your canvas with water, apply your first colour, and then quickly apply your second colour next to it while the first is still wet. Use a separate, clean, and slightly damp soft brush to gently mix the area where the colours meet.
2. How do you keep acrylic paint wet for blending? There are several methods:
- Use a fine mist spray bottle to lightly spray your canvas and your paint palette.
- Mix an “acrylic retarder” or “slow-dri medium” into your paints before you apply them.
- Use a stay-wet palette, which keeps your paints moist from below.
3. What brush is best for blending acrylics? A soft-bristled synthetic brush is best because it doesn’t leave harsh lines. Flat, filbert, and round brushes can all be used for applying paint, but a soft, fluffy “mop” brush is excellent for the final, gentle blending of two colours.
4. Can you blend acrylics with just water? Yes, you can, but with limitations. Adding a little water to your paint makes it more fluid and easier to spread. However, adding too much water (more than 30%) can break down the acrylic binder, causing the paint to lift off the canvas or dry with a chalky, uneven finish. For best results, it’s recommended to use an acrylic medium.
Citations
- Kemp, Will. “Glossary of Acrylic Painting Terms – The Ultimate Guide for Beginners.” Will Kemp Art School, willkempartschool.com/glossary-of-acrylic-painting-terms-the-ultimate-guide-for-beginners/. Accessed August 2, 2025.
- “Acrylic Paint Blending Techniques.” Art to Art, www.arttoart.net/blogs/resources/acrylic-paint-blending-techniques. Accessed August 2, 2025.
- “How To Use Acrylic Paint – A Beginners Guide.” ZenART Supplies, shop.zenartsupplies.co/blogs/toolkit/how-to-use-acrylic-paint. Accessed August 2, 2025.
- Oswald, Lori. “Beginner’s Guide to Acrylic Painting Techniques.” The Outdoorsy Artist, theoutdoorsyartist.com/beginner-acrylic-painting-techniques/. Accessed August 2, 2025.
- Reyner, Nancy. “Acrylic Painting: Techniques, Textures & Color Theory Tips.” Nancy Reyner, nancyreyner.com/2024/08/02/paint-like-a-master-a-closer-look-on-acrylic-painting-techniques/. Accessed August 2, 2025.
- “Acrylic Painting Techniques. Discover, Explore, Experiment!” Explore Acrylic Painting, www.explore-acrylic-painting.com/acrylic-painting-techniques.html. Accessed August 2, 2025.

