
Have you ever looked at a drawing that seemed to move, vibrate, or pop right off the page? That moment when your brain says, “Wait a minute, that’s impossible!” is the magic of optical illusions. Whether it’s a hole in the paper that looks deep enough to fall into, or a triangle that defies the laws of physics, easy optical illusion drawings are the perfect gateway into the world of art.
You don’t need to be a master painter to create these mind-bending sketches. In fact, most of these tricks rely on simple geometry, repetitive patterns, and a little bit of shading know-how. It is less about artistic talent and more about understanding how our eyes and brains process information. By the end of this guide, you will have seven impressive party tricks up your sleeve and a solid understanding of how Op Art works.

Key Takeaways:
- Accessible Art: You can start with just a pencil, a ruler, and a piece of paper.
- Brain Hacking: Learn how Lateral Inhibition and perspective tricks fool your brain.
- Step-by-Step: 7 distinct tutorials ranging from the “Impossible Triangle” to 3D anamorphic holes.
- Mental Benefits: Discover why doodling patterns can significantly lower stress levels.
Why Draw Optical Illusions? The Science & Art of ‘Op Art’
Before we put pencil to paper, it helps to understand exactly what we are doing. Optical Art, or “Op Art,” isn’t just doodling; it is a calculated interplay between space, light, and geometry.
A Brief History: From Vasarely to Bridget Riley
The Op Art movement exploded in the 1960s, though its roots go back much further. Artists like Victor Vasarely are often credited as the grandfathers of this style. Vasarely played with geometric shapes and colorful patterns to create a sense of bulging or kinetic motion on flat canvases. Later, British artist Bridget Riley became a household name for her black-and-white paintings that seemed to shimmer and wave, inducing a physical sensation in the viewer.
And, of course, we cannot forget M.C. Escher. While his work is more surrealist, his mastery of the “Impossible Object”—like staircases that go nowhere—laid the groundwork for the easy optical illusion drawings we will tackle today. If you are interested in how different artistic eras connect, you might enjoy reading about painting styles and movements.
The Science of Sight: How Lateral Inhibition Tricks Your Brain
Why do these drawings work? It comes down to a physiological phenomenon called Lateral Inhibition.
Your retina is packed with light receptors. When one receptor gets excited by bright light (white paper), it tries to suppress the activity of its neighbors. This creates high contrast at edges. In illusion drawings, specifically grids (like the Hermann Grid), this battle between neurons creates “ghost dots” or vibrating boundaries that aren’t actually there. Essentially, your eyes are working so hard to define the edges that they create data that doesn’t exist.
Mental Health Benefits: Why 45 Minutes of Doodling Reduces Cortisol
Art isn’t just about the final product; it’s about the process. According to a study by Kaimal et al. (2016), engaging in art-making for just 45 minutes can reduce cortisol (the stress hormone) levels by up to 75%.
Drawing repetitive geometric patterns—common in optical illusions—induces a “flow state” similar to meditation. It requires focus, which pushes out intrusive thoughts. If you are looking for ways to destress, checking out a guide on finding art inspiration can help keep that creative therapy going.

Essential Tools for Optical Illusion Art
One of the best things about learning easy optical illusion drawings is the low barrier to entry. However, having the right tools can make the difference between a drawing that looks “okay” and one that pops off the page.
Paper Matters: Dot Grid vs. Blank vs. Toned Paper
- Graph/Dot Grid Paper: This is the beginner’s best friend. Illusions rely on precise parallel lines and angles. A grid acts as your training wheels.
- Bright White Bristol Board: For high-contrast black ink work, smooth paper prevents ink bleeding.
- Toned Paper (Grey or Tan): This is the secret weapon for 3D art. By using white pencil for highlights and black for shadows on grey paper, you instantly create depth. Choosing the right surface is crucial; for a deeper dive, read our guide on choosing the right canvas or paper.
The ‘High Contrast’ Kit: Best Markers & Pencils (Budget vs. Pro)
You don’t need to break the bank, but contrast is king in Op Art. Here is a breakdown of what you might need.
| Tool Category | Budget Option (Generic/Crayola) | Pro Option (Micron/Prismacolor) | Why You Need It | Est. Cost Difference |
|---|---|---|---|---|
| Pencils | HB School Pencil | Set of Graphite (2H to 6B) | Range of values for 3D shading. | $2 vs. $15 |
| Fine Liners | Standard Ballpoint Pen | Pigma Micron (01, 05, 08) | Crisp, non-fading black lines. | $1 vs. $25 |
| Erasers | Pink Rubber Eraser | Kneaded Eraser | Lifts graphite without damaging paper. | $0.50 vs. $4 |
| Ruler | Plastic School Ruler | Cork-backed Metal Ruler | Prevents smudging ink while measuring. | $1 vs. $8 |
| Markers | Sharpies | Copic or Ohuhu Markers | Smooth, streak-free solid fills. | $5 vs. $40+ |
If you are building your kit from scratch, check out this essential guide to painting and drawing supplies.
Must-Have Accessories: Rulers, Compasses, and Blending Stumps
Never underestimate the blending stump (tortillon). When shading a sphere or a drop shadow to create a 3D effect, your finger oils can ruin the paper. A paper stump smears the graphite smoothly for that photorealistic gradient. For more on getting that smooth look, see our tutorial on mastering the blending technique.
7 Easy Optical Illusion Drawings (Step-by-Step Tutorials)
Ready to trick your brain? Let’s dive into these seven tutorials. We will start simple and move toward more complex 3D rendering.

1. The Impossible Triangle (Penrose Triangle)
The Penrose Triangle is the classic “impossible object.” It looks like a solid 3D triangle, but its geometry cannot exist in real life.
- Step 1: Drawing the equilateral base.
Draw a large equilateral triangle with your ruler. Inside that, draw a slightly smaller triangle (parallel lines). Inside that, draw a third, even smaller triangle. You should have three concentric triangles. - Step 2: Adding internal parallel lines.
Erase the corners. This is the tricky part. You need to extend the lines of the inner triangles to “cut off” the corners of the outer triangle in a specific pattern. Imagine you are drawing three beams of wood overlapping each other. - Step 3: Connecting corners to create the ‘twist’.
Draw a short diagonal line connecting the inner corner to the corresponding outer corner. Do this for all three sides, but ensure the “overlap” direction is consistent (e.g., the top bar is in front of the right bar, the right bar is in front of the bottom bar, etc.). - Step 4: Shading for depth (The Secret Sauce).
Decide where your light is coming from (usually top-left). Shade the “inside” surfaces darkest, the bottom surfaces medium, and leave the top surfaces white. This contrast creates the illusion of depth.
2. The 3D Hole in Paper (Anamorphic Art)
This is a favorite for social media. It relies on anamorphosis—a distorted projection that looks normal only from one specific viewpoint.
- Step 1: Mapping the grid distortion.
Draw a square grid on the bottom half of your paper. As you move toward the top, begin to squish the grid lines closer together vertically, but fan them out horizontally. This mimics perspective. - Step 2: Sketching the ‘ladder’ or ‘checkerboard’ inside.
Draw a shape (like a square hole) over this distorted grid. The back lines of the hole should be narrower than the front lines. - Step 3: The crucial drop shadow technique.
Shade the inside of the hole pitch black. Then, lightly shade the vertical walls of the hole. - Step 4: Finding the perfect camera angle.
Close one eye or look through your phone camera. Tilt the paper until the distorted grid looks perfectly square. Suddenly, the hole will look like it is dropping deep into the desk!
3. The ‘Floating’ 3D Hand
This is arguably the easiest and most effective beginner illusion. It utilizes simple line variation to suggest form.
- Step 1: Tracing your hand lightly.
Place your hand on the paper and trace the outline very lightly with a pencil. - Step 2: The ‘Straight-Curved-Straight’ line technique.
Take a marker. Start drawing horizontal straight lines across the paper. When you hit the pencil outline of your hand, arch the line upward in a curve, then go back to straight once you pass the hand. - Step 3: Adding contrast.
Fill the whole page. The curved lines mimic the contour of a 3D object. Erase the pencil outline. You can enhance this by adding a shadow on one side of the “hand” lines. Understanding line work is vital; you can learn more about brush and pen strokes in our guide on brush stroke techniques.
4. The Impossible Oval (Cognitive Illusion)

Similar to the triangle, this involves drawing two ovals (one inside the other) and connecting them with vertical lines to create a ring. By erasing specific intersecting lines, you can make it look like the ring is twisting inside out. The trick is to alternate which line is “on top” at every intersection.
5. The Moving Tunnel (Op Art Vortex)
This is a classic Op Art doodle.
- Draw a dot in the center.
- Draw 8-10 lines radiating from the center to the edge (like a pizza).
- Draw curved lines connecting the “pizza slices,” creating a web.
- Coloring: This is key. Color the shapes in a checkerboard pattern (Black/White). Because the lines get smaller toward the center, the high contrast makes the center appear to recede or spin.
- Tip: Using complementary colors can make the vibration more intense. Learn more about color theory basics here.
6. The Hermann Grid (Physiological Illusion)
This is easier to draw than it looks.

- Draw a black background.
- Leave white straight grid lines running vertically and horizontally.
- Where the white lines intersect, your brain will produce faint grey blobs or dots.
- Why? This is the Lateral Inhibition we discussed earlier. Your eyes interpret the intersection (surrounded by more white) as darker than the lines (surrounded by black).
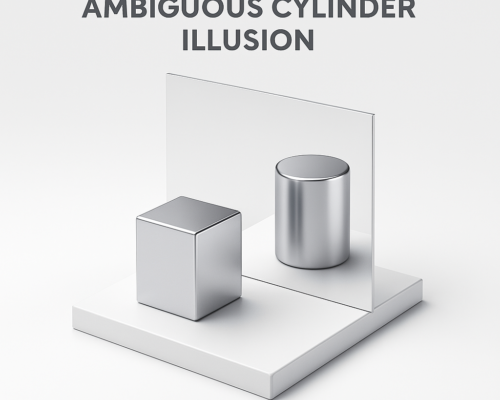
7. The Ambiguous Cylinder (Square or Circle?)
This requires some understanding of perspective. You draw a shape that looks like a square tube from one angle and a cylinder from another. This is advanced anamorphosis and usually requires a mirror to view correctly, but sketching the basic “Squircle” (square-circle hybrid) is a great exercise in learning perspective techniques.

Common Beginner Mistakes (and How to Fix Them)
Even with easy optical illusion drawings, things can go wrong. Here is how to troubleshoot.

“My Drawing Looks Flat” – Fixing Value & Contrast
If your 3D hole looks like a 2D sticker, you lack range in your values. A drawing needs pure white, pure black, and mid-tones. Beginners often stay in the “mid-grey” zone. Don’t be afraid to press hard with your 4B or 6B pencil for shadows.
- Resource: Read about fixing overworked art to understand how to recover contrast.
“The Lines Are Wobbly” – Wrist vs. Shoulder Motion
Op Art requires crisp lines. If you draw from your wrist, your range of motion is limited, leading to shaky, short lines. Try locking your wrist and drawing from your elbow or shoulder. This creates smoother, longer strokes essential for grid illusions.
Perspective Pitfalls: Understanding the Vanishing Point
For the 3D block and hole illusions, all diagonal lines must point to a specific Vanishing Point. If they are parallel (Isometric) that is fine, but if you are doing 1-point perspective and your lines drift, the illusion breaks. Always mark a tiny “X” on your paper as your vanishing point before starting.
- Learn more: Check out common painting mistakes beginners make.
Advanced Techniques: Taking It to the Next Level
Once you have mastered the basics, how do you elevate your art?
Adding Color for Vibrating Boundaries

Black and white is classic, but color adds a new dimension. Using “Clashing” colors (colors of equal intensity) next to each other creates a vibrating edge. For example, a bright red next to a bright cyan can be painful to look at—in a good way! This is pure Op Art theory.
Digital Op Art: Translating Skills to Procreate/Photoshop
The principles of the Penrose Triangle or Anamorphosis apply perfectly to digital art. Tools like the “Symmetry” guide in Procreate make drawing mandalas and vortexes incredibly fast. Plus, you have an “Undo” button! If you are interested in making the switch, read our step-by-step guide to your first digital artwork.
Frequently Asked Questions (FAQ)
What is the easiest optical illusion to draw?
The Floating Hand (Tutorial #3) is widely considered the easiest. It requires no rulers or measurements—just tracing your hand and drawing lines. It is perfect for kids and absolute beginners.
Do I need special graph paper?
You don’t need it, but it helps immensely. Isometric graph paper (which has a grid of triangles instead of squares) is specifically designed for drawing 3D shapes like the Penrose Triangle without needing to measure angles.
How do I make my drawings look 3D on camera?
The secret is the angle. Anamorphic drawings are distorted on purpose. Place your camera at a low angle (usually 45 degrees) relative to the paper. Also, ensure your lighting casts a real shadow that aligns with the drawn shadow in your artwork.
How long does it take to draw a mandala vs optical illusion?
A complex mandala can take hours due to intricate details. A simple linear optical illusion (like the Impossible Trident) can be sketched in under 5 minutes. However, a fully shaded 3D hole might take 30–45 minutes.
Why does my 3D drawing look flat?
It is usually a lack of cast shadows. Objects in the real world block light. If you draw a floating cube but don’t draw the shadow it casts on the ground, your brain won’t accept it as a 3D object.
Conclusion: Start Your Op Art Journey Today
Optical illusions remind us that reality is a matter of perception. By learning these easy optical illusion drawings, you aren’t just making cool pictures; you are training your brain to see depth, light, and structure in new ways.
Whether you are doing this to relax, to impress friends, or to build a foundation for a serious art career, the key is to start. Grab a pencil, draw that first impossible triangle, and enjoy the confusion you create!
If you are ready to move from pencil sketches to full paintings, check out our guide on how to start your first painting from a sketch.
Citations
- Kaimal, G., Ray, K., & Muniz, J. (2016). Reduction of Cortisol Levels and Participants‘ Responses Following Art Making. Art Therapy.
- Andrade, J. (2009). What does doodling do?
- Vasarely, V. (1965). The Responsive Eye. Museum of Modern Art.

