
The holiday season brings with it a unique blend of joy, warmth, and a desire to create something special. What better way to capture this festive spirit than by dipping your brush into vibrant colors and transforming a blank canvas into a Christmas masterpiece? Christmas canvas painting is more than just a craft; it’s an opportunity to create personalized decorations, heartfelt gifts, and lasting memories that will brighten your home and warm the hearts of loved ones for years to come.
Key Points Summary: This comprehensive guide covers everything you need to start your Christmas canvas painting journey – from essential supplies and inspiring design ideas to professional techniques and display options. Whether you’re a complete beginner or experienced artist, you’ll discover step-by-step instructions, creative project ideas, and expert tips to create stunning holiday artwork that captures the magic of the season.
Why Embrace Christmas Canvas Painting This Holiday Season?
There’s a special magic in creating something with your own hands, and Christmas canvas painting offers numerous delightful benefits that go far beyond simple decoration. Firstly, it allows for unparalleled personalization that you simply can’t find in store-bought decor. Your hand-painted canvas can reflect your unique style, family traditions, and favorite holiday elements, making your home truly one-of-a-kind.
Beyond decoration, these paintings make incredibly thoughtful and budget-friendly gifts. Imagine presenting a loved one with a piece of art you’ve poured your heart into—it’s a gift that carries sentiment and personal touch far beyond its material value. The joy of receiving something handmade is incomparable to any mass-produced item.
Moreover, it’s a wonderfully relaxing and engaging activity for individuals or a fun, creative project for the entire family. Painting has been proven to reduce stress and improve mental well-being, making it the perfect antidote to holiday chaos. Whether you’re looking for a peaceful solo activity or an opportunity to create DIY art projects with your kids, Christmas canvas painting offers the perfect creative outlet that fosters bonding and unforgettable holiday memories.
Key Supplies for Your Christmas Canvas Painting

Before you dive into creating your festive masterpiece, gathering the right supplies is crucial for success. The good news? You don’t need to break the bank to get started. Here’s a comprehensive list of materials needed for your Christmas canvas painting adventure, suitable for various skill levels.
| Supply Item | Description | Beginner Recommendation | Pro Tip |
|---|---|---|---|
| Canvas | The surface for your painting, available in various sizes and shapes | Pre-primed stretched canvas (8×10 or 11×14 inches) | Consider canvas panels for practice or small gifts |
| Acrylic Paints | Fast-drying, water-soluble paints, versatile for beginners | Basic set of 12-18 acrylic colors (red, green, white, blue, yellow, black) | Invest in artist-grade white for better coverage and mixing |
| Brushes | Tools for applying paint, coming in different shapes and sizes | Variety pack including flat, round, and detail brushes | Keep a separate brush for metallic or glitter paints |
| Palette | Surface for mixing paints | Paper plates, plastic lid, or disposable palette paper | A wet palette keeps paints workable for longer |
| Water Container | For rinsing brushes | Two plastic cups (one for initial rinse, one for clean water) | Change water frequently to avoid muddy colors |
| Paper Towels/Rags | For wiping brushes and cleaning up spills | Roll of paper towels or old cloth rags | Keep them handy for quick corrections and drying brushes |
| Pencil & Eraser | For sketching your design before painting | HB pencil and a soft eraser | Sketch lightly so pencil lines don’t show through paint |
| Varnish/Sealant | Protects your finished painting from dust and UV light | Clear acrylic spray varnish (matte or gloss finish) | Apply in thin, even coats in a well-ventilated area |
Understanding color theory basics will help you choose the perfect paint colors for your Christmas canvas painting. Traditional holiday colors like red, green, gold, and white are always popular, but don’t be afraid to experiment with non-traditional palettes like blues and silvers for a winter wonderland theme.
Inspiring Christmas Canvas Painting Ideas for Every Skill Level
The beauty of Christmas canvas painting lies in the endless possibilities for themes and designs. Whether you’re a complete novice or have some artistic experience under your belt, there’s an idea perfect for you. Let’s explore festive projects organized by skill level.
Beginner-Friendly Christmas Canvas Ideas

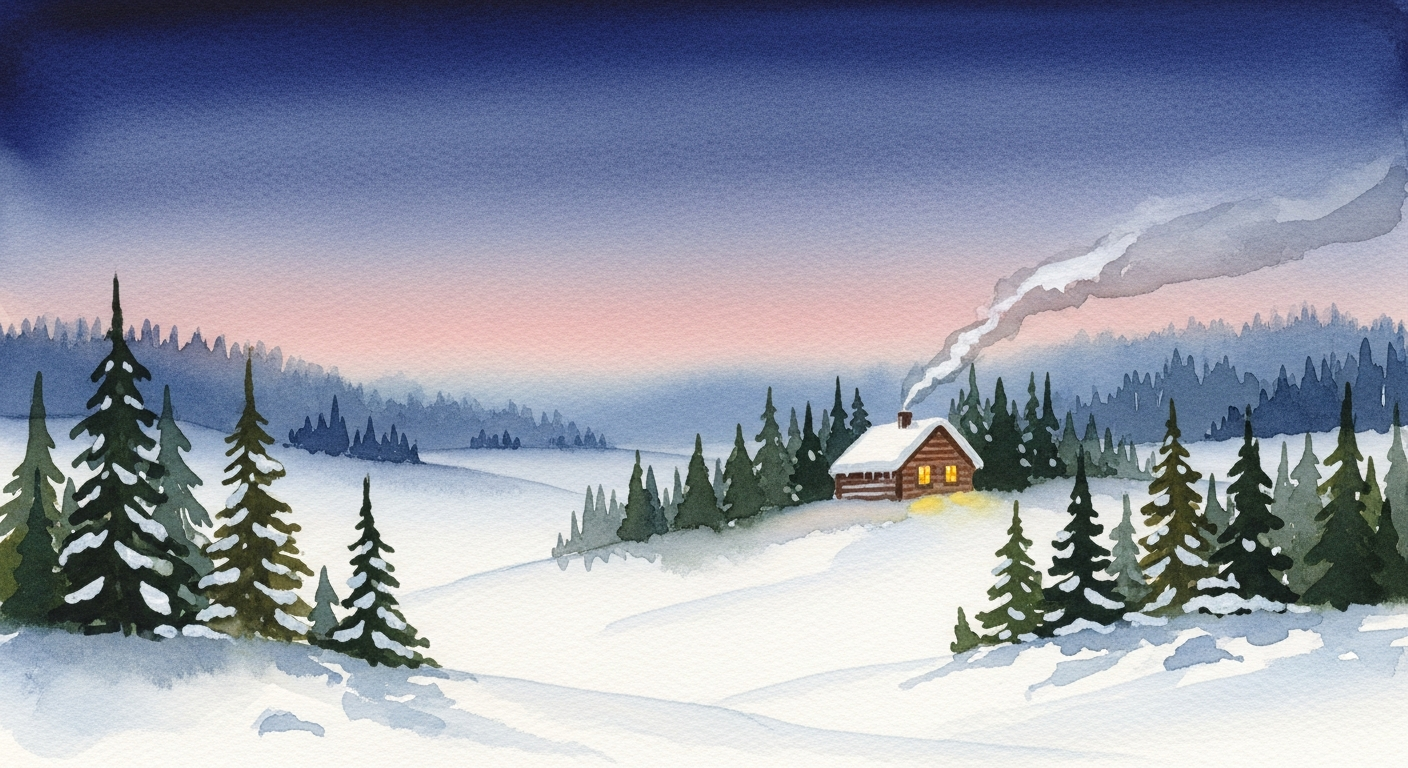
For beginners, simple silhouettes are a fantastic starting point. Think about painting a dark silhouette of a Christmas tree against a starry, gradient background, or a cozy winter cabin under a snowy moon. These designs look impressive but don’t require advanced painting skills.
Stencils can also be your best friend for crisp, clean designs like snowflakes, reindeers, or festive lettering. You can create a beautiful “Joy,” “Peace,” or “Merry Christmas” canvas using stencils and a few paint colors. Easy canvas art ideas are perfect for first-time painters.
Simple geometric patterns with Christmas colors also work wonderfully. Try painting abstract ornaments, candy canes in a modern style, or a minimalist Christmas tree made from colorful triangles. These projects teach you about color mixing and brush control without overwhelming you with complex details.
Intermediate Christmas Canvas Painting Projects
Intermediate painters might explore more detailed landscapes, like a snowy village scene complete with smoking chimneys and twinkling windows, Santa’s sleigh soaring across the night sky, or a close-up of a decorated ornament reflecting holiday lights. These projects allow you to practice creating depth in paintings and working with multiple layers.
Experiment with different brush stroke techniques to create texture for snow, fur on reindeer, or the needles on evergreen trees. You could paint a wreath with various textures of berries, pinecones, and ribbons, or capture the warm glow of candlelight in a holiday window scene.
Consider incorporating elements from landscape painting techniques to create atmospheric winter scenes. Practice painting snow-covered pine trees, frozen lakes, or mountain ranges under a winter sky.
Advanced Christmas Canvas Art

Advanced artists can delve into photorealistic scenes that capture the intricate details of the holiday season—think individual ornaments with reflections, detailed portraits of beloved holiday characters, or complex compositions incorporating multiple elements and advanced shading techniques.
You might challenge yourself with still life paintings featuring Christmas items like vintage ornaments, wrapped gifts, or holiday treats. Advanced blending painting techniques will help you achieve smooth color transitions and realistic lighting effects.
Don’t be afraid to experiment with mixed media, adding glitter, beads, or even small baubles for extra dimension. Some artists incorporate texture painting techniques using materials like modeling paste or textured gels to create three-dimensional elements on their canvas.
“The best Christmas canvas paintings are those that capture not just the visual beauty of the season, but the feeling – the warmth, the magic, and the joy that makes this time of year so special.”
Mastering Christmas Canvas Painting Techniques
Achieving a beautiful Christmas canvas painting involves several key techniques that can elevate your work from basic to breathtaking. Let’s explore the essential methods you need to know.
Color Application and Blending
For vibrant colors, remember to use multiple thin layers of paint rather than one thick one. This allows for smoother blending and prevents cracking as the paint dries. When working with acrylics, blend quickly as they dry fast—adding a tiny bit of water to your brush or using a blending medium can extend your working time.
Understanding color theory is essential for mixing the perfect holiday hues. Learn how to create rich greens for evergreens, warm reds for Santa’s suit, and luminous whites for snow. The color mixing primer guide offers detailed instructions on achieving specific shades.
Creating Depth and Dimension
Creating depth and dimension is crucial for captivating art. Use lighter colors and brighter highlights on areas that would catch direct light—like the tip of a Christmas tree or the front of ornaments. Apply deeper shadows in recessed areas behind branches or under eaves.
Understanding the principles of light and shadow helps create realistic three-dimensional effects. Even in simple designs, proper shading makes objects appear to pop off the canvas.
Special Effects for Festive Magic

For painting snow, try a ‘dabbing’ technique with a stiff brush or sponge for a textured, fluffy look. Add tiny white dots with the tip of your brush handle or a toothpick for falling snowflakes. This technique adds movement and life to your winter scenes.
Don’t forget the magic of metallic paints and glitter for that extra festive sparkle! Apply them sparingly as a final touch to elements like ornaments, stars, or snow highlights. These special effects catch the light and add a professional polish to your finished piece.
Consider using impasto technique for certain elements like snow drifts or thick paint applications that create actual texture you can feel. This adds an extra dimension of interest to your Christmas canvas painting.
Step-by-Step: Creating Your First Christmas Canvas Painting
Let’s walk through creating a simple but beautiful Christmas canvas painting—a snowy pine tree at twilight. This project is perfect for beginners and takes about 2-3 hours to complete.
Materials Needed:
- 11×14 inch stretched canvas
- Acrylic paints: white, black, dark blue, light blue, green (dark and light), brown
- Brushes: 1-inch flat, medium round, small detail brush
- Palette, water containers, paper towels
- Pencil
Step 1: Sketch Your Design Lightly sketch a simple pine tree shape in the center of your canvas using a pencil. Don’t worry about perfection—this is just a guide. Draw a simple trunk and triangular shape for the tree’s outline.

Step 2: Create the Sky Background Mix dark blue with a touch of black for the top of your canvas. Using your 1-inch flat brush, apply horizontal strokes across the top third of the canvas. Gradually add more white to your blue mixture as you work downward, creating a gradient effect from dark night sky to lighter horizon. Mastering acrylic painting techniques will help with this step.
Step 3: Paint the Ground While the sky is still slightly wet, paint the ground area in white with hints of light blue mixed in for shadows. Use gentle horizontal strokes to suggest snow-covered ground.
Step 4: Build Your Tree Start with dark green for the tree’s base layer. Using your medium round brush, create the basic tree shape with downward strokes that suggest pine branches. Let this layer dry for 15-20 minutes.
Step 5: Add Depth and Highlights Mix lighter green (add yellow and white to your green) and add highlights to the top and outer edges of branches where moonlight would hit. Use a dabbing motion with your brush for a textured, realistic effect.
Step 6: Details and Snow Using your small detail brush and brown paint, add a trunk and visible branches. Then, with pure white paint, add snow along the tops of branches using short strokes. Add small white dots throughout the sky for falling snow and stars.
Step 7: Final Touches Step back and assess your painting. Add any final highlights or shadows needed. Some artists add a touch of metallic silver or iridescent white to certain snowflakes for extra sparkle.
Fixing Mistakes and Overcoming Creative Blocks
Even experienced artists make mistakes, and that’s perfectly okay! The beauty of acrylic paint is that it’s very forgiving. If you make an error, simply let it dry and paint over it. Fixing painting mistakes is an essential skill every artist should master.
For major issues, you can paint over the entire section with gesso (primer) once it’s dry and start fresh. Don’t let perfectionism stop you from enjoying the creative process. Remember, some of the most beautiful effects happen by accident—famous painting mistakes that became masterpieces prove this point!
If you’re feeling stuck or uninspired, try these strategies to overcome creative blocks:
- Browse Pinterest or Instagram for Christmas art inspiration
- Take a break and return to your painting with fresh eyes
- Try a completely different design or color scheme
- Paint along with a YouTube tutorial to get your creative juices flowing
- Don’t be afraid to experiment—your personal style will emerge naturally
Displaying and Gifting Your Hand-Painted Christmas Creations
Once your Christmas canvas painting is complete and fully dry (which can take 24-48 hours for acrylics, depending on thickness), it’s time to decide how to share your masterpiece with the world. The options are endless and exciting!
Display Ideas for Your Home
For displaying in your home, consider placing smaller canvases on shelves, mantels, or tabletop easels. They make perfect accents on side tables or grouped with other holiday decorations. Larger pieces can be hung directly on walls as a festive focal point in your living room, entryway, or dining area.
Create an impressive gallery wall by grouping several smaller, coordinating canvases together. Try a theme like “12 Days of Christmas” with twelve small canvas paintings, or create a triptych (three-panel design) showing a winter landscape scene. Jaw-dropping artwork display ideas can inspire creative ways to showcase your festive art.
Consider seasonal rotation—display your Christmas canvas paintings prominently during the holidays, then store them safely to bring out year after year. Each time you unpack them, they’ll bring back wonderful memories of the time you spent creating them.
Gifting Your Handmade Art
If your painting is destined to be a gift, presentation matters! Frame the canvas for a polished look, or simply wrap it beautifully in festive paper and a bow. Include a handmade tag explaining the inspiration behind the painting or a personal message about what the recipient means to you.
Hand-painted Christmas canvases make incredibly meaningful gifts for:
- Family members who appreciate handmade items
- Teachers or coaches as thank-you gifts
- New homeowners who need holiday decorations
- Elderly relatives or neighbors who may feel lonely during the holidays
- Anyone who values personal, thoughtful presents over commercial items
A hand-painted Christmas canvas is not just a gift; it’s a cherished memory and a piece of your heart, sure to be treasured for years to come. Recipients often report that handmade gifts hold special significance and are displayed with pride.

Advanced Tips from Professional Artists
Once you’ve mastered the basics, these professional techniques will take your Christmas canvas painting to the next level:
Composition and Planning
Before touching brush to canvas, plan your composition using established art principles. The rule of thirds helps create balanced, visually appealing designs. Position your main focal point (like a Christmas tree or Santa) off-center rather than directly in the middle.
Consider creating focal points that draw the viewer’s eye exactly where you want it. This might be a bright star atop a tree, a glowing window in a snowy cabin, or Santa’s face in a portrait.
Working with Layers
Professional-looking paintings often involve multiple layers. Start with a base layer that establishes your overall color scheme and values. Add subsequent layers to build depth, texture, and detail. Allow each layer to dry before adding the next for the best results.
Learning from masters helps improve your technique. Study how famous artists and their styles approached color, composition, and subject matter. You don’t need to copy them, but understanding their methods can inspire your own unique approach.
Finishing Touches
After your painting is completely dry, seal it with a varnish to protect it from dust, moisture, and UV damage. This also adds a professional finish and can enhance colors. Choose between matte, satin, or glossy finishes depending on your preference.
Sign and date your work! Even if you’re a beginner, your painting has value. Years from now, you’ll love seeing how your skills have developed. Plus, if you decide to sell your art online in the future, having a consistent signature helps with branding.
Frequently Asked Questions About Christmas Canvas Painting
What kind of paint is best for Christmas canvas painting?
Acrylic paints are generally the best choice for Christmas canvas painting, especially for beginners. They are water-soluble, fast-drying, easy to clean up, and offer vibrant colors with good coverage. They also work well on various surfaces, including canvas. Mastering acrylic painting provides comprehensive guidance on using this versatile medium. For those interested in other options, compare oil vs acrylic vs watercolor to understand the differences.
How do I protect my finished Christmas canvas painting?
Once your painting is completely dry (wait at least 24-48 hours), apply a clear acrylic varnish or sealant. This will protect the paint from dust, dirt, moisture, and UV rays, preventing fading over time. Varnishes come in matte, satin, or gloss finishes, allowing you to choose the look you prefer. Apply multiple thin coats rather than one thick coat for best results.
Can children participate in Christmas canvas painting?
Absolutely! Christmas canvas painting is a fantastic activity for children of all ages. Use washable acrylics or tempera paints, provide child-safe brushes, and choose simple designs like handprint trees, abstract snow scenes, or basic ornaments. It’s a great way to foster creativity and create holiday memories. DIY art projects for kids offers age-appropriate ideas.
Where can I find inspiration for Christmas canvas designs?
Inspiration is everywhere! Look at holiday cards, magazines, Pinterest boards, Instagram accounts, or even children’s books for ideas. Nature offers beautiful motifs like snowflakes, pinecones, and winter landscapes. You can also draw inspiration from personal memories, family traditions, or beloved Christmas songs and stories. Unleashing your inner artist provides excellent guidance on finding creative inspiration.
How long does it take for acrylic paint to dry on canvas?
Acrylic paint dries relatively quickly, often becoming touch-dry within 15-30 minutes, depending on the thickness of the application and humidity levels. However, for a painting to be fully cured and ready for varnishing, it’s best to wait at least 24-48 hours, especially for thicker layers. Learn how to make paint dry faster if you’re working on a tight timeline.
Do I need expensive supplies to create beautiful Christmas canvas paintings?
Not at all! While professional-grade materials can enhance your work, beginners can create stunning pieces with affordable art supplies. Start with a basic set of acrylic paints, a few brushes in different sizes, and a pre-primed canvas. As you develop your skills and style, you can gradually invest in higher-quality materials.
What if I make a mistake while painting?
Mistakes are a natural part of the creative process! With acrylics, you can simply let the error dry and paint over it. For larger issues, you can reprime the area with gesso and start fresh. Fixing painting mistakes offers detailed strategies for salvaging your work. Remember, some “mistakes” lead to beautiful, unexpected results!
Can I use Christmas canvas painting as a business opportunity?
Yes! Many artists successfully sell holiday-themed art. Christmas canvas paintings are popular in craft fairs, on Etsy, and through local markets. Consider creating a series of designs that you can reproduce efficiently. Learn how to sell art online in 2025 and explore how to start an art business for comprehensive guidance on turning your hobby into income.
Conclusion: Cherish Your Hand-Painted Holiday Moments
Christmas canvas painting offers a joyful and rewarding way to celebrate the holiday season, blending artistic expression with festive cheer. Whether you’re creating unique decorations for your home or crafting heartfelt, personalized gifts for loved ones, the process itself is a valuable part of the holiday experience. Each brushstroke carries your personal touch, making every piece truly special and unrepeatable.
With the right supplies, a little inspiration from the ideas we’ve explored, and a dash of creativity, anyone can transform a blank canvas into a cherished piece of Christmas art. Don’t worry about perfection—focus on enjoying the creative journey and capturing the warmth and magic of the season. Remember that painting techniques for beginners develop over time with practice and patience.
So gather your paints, embrace the spirit of the season, and let your imagination bring the magic of Christmas to life, one brushstroke at a time. Whether you’re painting solo by the fire with hot cocoa or hosting a festive painting party with friends and family, Christmas canvas painting connects us to the handmade traditions that make the holidays truly meaningful. Your paintings will become treasured decorations that you’ll proudly display year after year, each one holding memories of the creative time you spent bringing them to life.
Citations:
- The Spruce Crafts – Painting Tutorials and Techniques: https://www.thesprucecrafts.com/
- Blick Art Materials – Art Supply Guide: https://www.dickblick.com/
- Artists Network – Painting Tips and Resources: https://www.artistsnetwork.com/
- ProminentPainting.com – Color Theory Basics: https://prominentpainting.com/color-theory-basics/
- ProminentPainting.com – Mastering Acrylic Painting Guide: https://prominentpainting.com/mastering-acrylic-painting-a-complete-guide-for-beginners/
- ProminentPainting.com – Canvas Selection Guide: https://prominentpainting.com/how-to-choose-the-right-canvas-for-your-art/
- ProminentPainting.com – Framing and Varnishing Guide: https://prominentpainting.com/the-ultimate-guide-to-framing-and-varnishing-your-finished-painting/

