Acrylic pouring is a captivating art technique that has gained immense popularity in recent years. It is a fluid art form that involves pouring acrylic paint onto a surface, allowing it to flow and mix, creating unique and mesmerizing patterns. Acrylic Pouring for Beginners: this technique is perfect who are looking for an easy and creative way to express themselves through art. In this article, we will guide you through the basics of acrylic pouring, from essential supplies to techniques and tips for beginners.
Essential Supplies for Acrylic Pouring
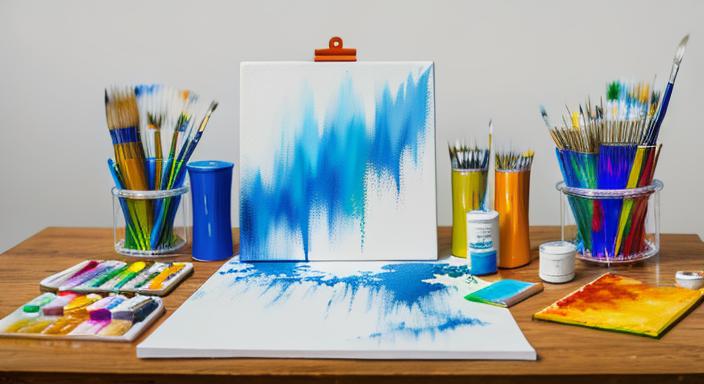
Before you dive into the world of acrylic pouring, it’s essential to have the right supplies. Some of the essential items you’ll need include:
- Acrylic Paints: Choose a variety of colors to create unique patterns and designs.
- Pouring Medium: This is a special additive that allows the paint to flow and mix more easily.
- Canvas: A smooth, non-porous surface is best for acrylic pouring.
- Containers: You’ll need containers to hold your paint and pouring medium.
- Mixing Sticks: These are used to mix your paint and pouring medium together.
- Gloves: Protect your hands from the paint and pouring medium.
- Drop Cloth: Cover your work surface to protect it from spills.
Understanding Pouring Medium for Acrylic Painting
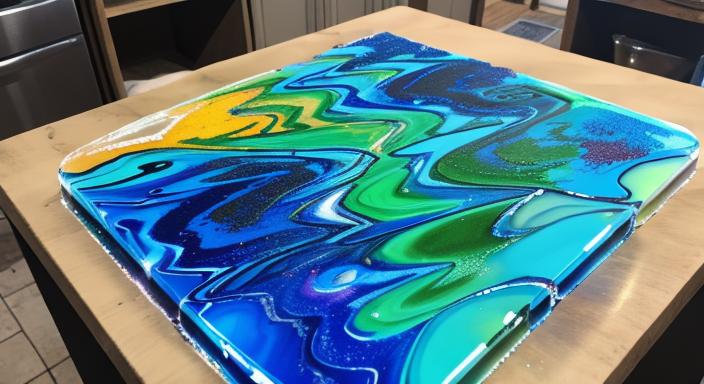
Pouring medium is a crucial component when working with acrylic paints, especially for the technique known as acrylic pour painting. It is a substance that is added to acrylic paint to improve its consistency and allow it to flow more easily when poured onto a surface. Pouring medium is available in various forms, such as pouring medium for acrylics, fluid painting pouring medium, or paint pouring art medium.
Pouring Medium Ratios
When using pouring medium with acrylic paints, it is essential to understand the appropriate ratios to achieve the desired results. A typical rule of thumb for medium body acrylics is to use 1 part paint to 3 parts pouring medium. This means that you should use more pouring medium than actual acrylic paint.
Mixing Pouring Medium and Acrylic Paints
To mix pouring medium with acrylic paints, start by adding a small amount of paint to a cup, followed by the pouring medium. Stir the mixture well using a stirrer or popsicle stick. Once you have mixed the paint and pouring medium, you can combine different colors in another clean cup, layering them on top of each other.
Using Pouring Medium for Acrylic Pour Painting
Pouring medium is essential for creating the fluid, smooth swirls and vibrant colors associated with acrylic pour painting. Straight out of the tube or bottle, acrylic paints will not naturally have the desired consistency for this technique. By adding pouring medium, you can transform the makeup of your paints, allowing them to be manipulated for fluid art or acrylic pour painting.
Choosing the Right Pouring Medium for Acrylic Painting
When selecting a pouring medium for acrylic painting, consider the brand and consistency you prefer. Some popular options include Floetrol, Elmer’s glue, and Magical Liquid by Elmer’s. Craft paint is not recommended for pour painting due to its low pigment content, which can result in dull and drab colors.
Factors to Consider When Choosing Pouring Medium
When selecting a pouring medium for acrylic painting, consider the following factors:
- Brand: Some brands are specifically designed for use with acrylic paints and may provide better results.
- Consistency: Choose a pouring medium that offers the desired consistency for your project.
- Pigment Content: Consider the pigment content of the paint you are using, as this can affect the final color and appearance of your painting.
Experimentation with Pouring Medium Ratios
There are basic guidelines for mixing paint with pouring medium, such as a 1:1 ratio for medium-bodied acrylics like Decco’s premium acrylics. However, ratios can be altered according to your preference or the look you are trying to achieve
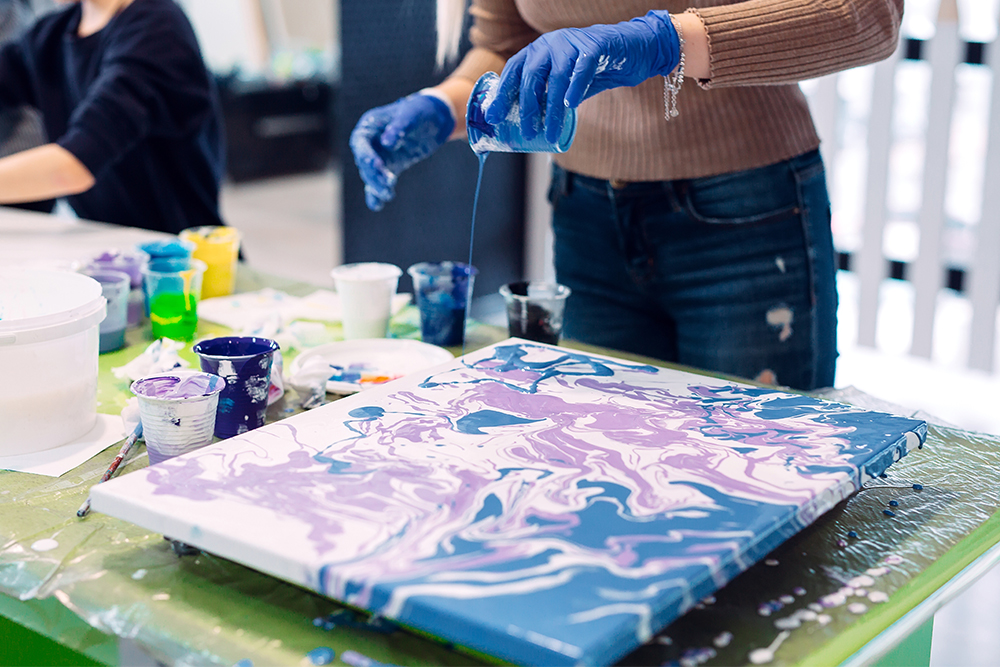
Be experimental with your poured art projects and don’t be afraid to adjust the ratios to achieve the desired results. In the next section, we will discuss the importance of preparing your workspace for acrylic pour painting and provide tips for creating a safe and effective environment for your art.
Preparing Your Workspace for Acrylic Pour Painting
Before starting your acrylic pour painting project, it’s essential to prepare your workspace to ensure a safe and effective environment for your art. This includes setting up your workspace, selecting the right surface, and protecting your hands.
Setting Up Your Workspace
To set up your workspace for acrylic pour painting, follow these steps:
- Choose a well-ventilated area: Acrylic paints and pouring medium can give off strong odors, so it’s essential to work in a well-ventilated area to avoid inhaling harmful fumes.
- Cover your work surface: Use a drop cloth or old sheets to protect your work surface from spills and drips.
- Gather your supplies: Organize your acrylic paints, pouring medium, containers, mixing sticks, and gloves in a convenient location.
Selecting the Right Surface
When choosing a surface for your acrylic pour painting, consider the following factors:
- Non-porous: Choose a non-porous surface, such as a smooth canvas or a piece of glass, to prevent the paint from seeping into the surface.
- Stable: Ensure the surface is stable and won’t move or shift during the pouring process.
- Level: Make sure the surface is level to avoid any unevenness in your pour.
Protecting Your Hands
To protect your hands during acrylic pour painting, wear gloves made of a material that allows for flexibility and breathability. This will help prevent your hands from becoming too wet and uncomfortable while working with the paint and pouring medium.
Choosing the Right Surface for Acrylic Pour Painting
Selecting the right surface is crucial for achieving the best results in acrylic pour painting. A smooth, non-porous surface is recommended for this technique, as it allows the paint to flow and mix more easily.
Smooth, Non-Porous Surface
A smooth, non-porous surface is recommended for acrylic pour painting, as it allows the paint to flow and mix more easily. This can include a smooth canvas, a piece of glass, or a specially designed acrylic pour painting surface.
Acrylic Pour Painting on Canvas
Canvas is a popular choice for acrylic pour painting due to its smooth texture and ability to hold the paint well. To prepare your canvas, prime it with a sealant or gesso to create a smooth surface for the paint to flow over.
Acrylic Pour Painting on Glass
Glass is another option for acrylic pour painting, offering a smooth, non-porous surface for the paint to flow over. However, it is essential to work with caution when pouring on glass, as the paint can be challenging to remove if it drips or spills.
Choosing the Right Surface for Your Project
When selecting the right surface for your acrylic pour painting project, consider the following factors:
- Smooth texture: A smooth surface allows the paint to flow and mix more easily.
- Non-porous: A non-porous surface prevents the paint from seeping into the surface.
- Stability: Ensure the surface is stable and won’t move or shift during the pouring process.
In the next section, we will discuss the basic techniques in acrylic pour painting and provide tips for beginners.
Basic Techniques in Acrylic Pour Painting
Acrylic pour painting is a versatile art form that allows you to create unique and mesmerizing patterns and designs. As a beginner, it’s essential to start with the basic techniques and gradually explore more advanced methods as you gain confidence and experience.
Video: Acrylic Pouring Technique
The Basic Pour Technique
The basic pour technique is a great starting point for beginners in acrylic pour painting. To execute this technique, follow these steps:
- Mix your acrylic paint with the appropriate amount of pouring medium to achieve the desired consistency.
- Pour the paint mixture into a clean container, layering different colors as desired.
- Tilt the container to allow the paint to flow and mix on the canvas or surface.
- Gently tilt and rotate the canvas to encourage the paint to spread and create unique patterns.
The Swipe Technique
The swipe technique is another popular acrylic pour painting method that involves using a tool, such as a palette knife or a credit card, to create linear patterns in the paint. To try this technique:
- Pour your paint mixture onto the canvas or surface.
- Dip your tool of choice into the paint and gently swipe it across the surface, creating linear patterns.
- Experiment with different angles and pressure to achieve various effects.
The Dirty Pour Technique
The dirty pour technique involves layering different colors of paint in a single container, then pouring the entire mixture onto the canvas or surface. This technique can create stunning, abstract patterns and designs. To try the dirty pour:
- Mix your acrylic paint with pouring medium in separate containers.
- Layer the different colors of paint in a single container, creating a “stack” of colors.
- Carefully pour the entire mixture onto the canvas or surface, allowing the paint to flow and mix.
- Tilt and rotate the canvas to encourage the paint to spread and create unique patterns.
Experimenting with Techniques
As you become more comfortable with the basic techniques, don’t be afraid to experiment and try new methods. Explore different color combinations, pouring techniques, and tools to create unique and visually stunning acrylic pour paintings.
Troubleshooting Common Issues in Acrylic Pour Painting
Acrylic pour painting can be a rewarding and enjoyable art form, but it’s not without its challenges. As a beginner, you may encounter various issues during the pouring process. In this section, we’ll address some common problems and provide solutions to help you overcome them.
Inconsistent Paint Consistency
One of the most common issues in acrylic pour painting is achieving the right consistency for your paint mixture. If the paint is too thick, it may not flow and mix properly, resulting in uneven or dull patterns. If the paint is too thin, it may not hold its shape or create the desired effects.
Solution: Adjust the ratio of paint to pouring medium to find the perfect consistency for your project. Start with a 1:3 ratio of paint to medium and experiment until you achieve the desired flow and movement.
Air Bubbles in the Finished Painting
Air bubbles can sometimes form in the paint during the pouring process, which can detract from the overall appearance of your artwork.
Solution: To prevent air bubbles, gently tap the canvas or surface after pouring to release any trapped air. You can also use a heat gun or torch to pop any remaining bubbles before the paint dries.
Uneven or Patchy Coverage
If your acrylic pour painting has uneven or patchy coverage, it may be due to an insufficient amount of paint or an uneven surface.
Solution: Ensure that you have enough paint mixture to cover the entire surface, and consider using a larger container or pouring in multiple layers to achieve full coverage. Additionally, make sure your surface is level and smooth to prevent any unevenness in the final result.
Dull or Muted Colors
If your acrylic pour painting appears dull or muted, it may be due to the quality or pigment content of your paint.
Solution: Use high-quality acrylic paints with a high pigment content to ensure vibrant and bold colors in your finished artwork. You can also experiment with adding a small amount of metallic or iridescent paint to your mixture to enhance the overall vibrancy.By addressing these common issues and implementing the solutions provided, you can improve your acrylic pour painting skills and create stunning, professional-looking artwork.
Exploring Advanced Acrylic Pouring Techniques
As you become more comfortable with the basic techniques in acrylic pour painting, you may want to explore more advanced methods to expand your creative possibilities. These techniques can help you achieve unique and visually stunning results.
The Flip Cup Technique
The flip cup technique is a popular advanced acrylic pouring method that involves pouring paint into a cup, inverting the cup onto the canvas, and then lifting the cup to reveal the resulting pattern.To try the flip cup technique:
- Mix your acrylic paint with pouring medium in separate cups, creating a variety of colors.
- Layer the different paint colors in a single cup, creating a “stack” of colors.
- Invert the cup onto your canvas or surface and hold it in place for a few seconds.
- Carefully lift the cup to reveal the unique pattern created by the paint.
- Tilt and rotate the canvas as needed to encourage the paint to flow and mix.
Incorporating Additives
Introducing various additives to your acrylic pour painting can also lead to interesting and unexpected results. Try adding a small amount of silicone oil or alcohol to your paint mixture to create cells or other unique patterns.
Exploring Negative Space
Intentionally leaving areas of your canvas or surface uncovered can create striking visual effects in your acrylic pour painting. Experiment with pouring techniques that allow for the creation of negative space, such as the Dutch pour or the ring pour.
Combining Techniques
Don’t be afraid to combine different acrylic pouring techniques to create even more complex and visually stunning artworks. Experiment with layering techniques, using various tools, and incorporating different additives to discover your own unique style.
Caring for Your Acrylic Pour Paintings
Once you’ve created your stunning acrylic pour paintings, it’s essential to properly care for and preserve them to ensure they last for years to come. In this section, we’ll cover the steps you can take to protect your artwork and maintain its vibrant colors and unique patterns.
Sealing Your Acrylic Pour Paintings
To protect your acrylic pour paintings, it’s essential to seal them with a clear, protective varnish or sealant. This will help prevent the paint from fading, cracking, or becoming damaged over time. When selecting a sealant, choose one that is specifically designed for use with acrylic paints. Apply the sealant in thin, even coats, allowing each layer to dry completely before adding the next.
Displaying Your Acrylic Pour Paintings
Proper display and framing can also help preserve your acrylic pour paintings. Avoid exposing your artwork to direct sunlight, as this can cause the colors to fade over time. Instead, display your paintings in a well-lit, but not overly bright, area. If you choose to frame your acrylic pour paintings, use a non-acidic, archival-quality frame and matting to prevent any damage to the artwork. You can also consider using UV-protective glass or acrylic to further protect your paintings from the effects of light exposure.
Cleaning and Maintaining Your Acrylic Pour Paintings
To clean your acrylic pour paintings, use a soft, dry cloth to gently wipe away any dust or debris. Avoid using water or any cleaning solutions, as these can potentially damage the paint and sealant. If you need to touch up or repair any areas of your painting, use a small amount of acrylic paint and carefully blend it into the existing surface. Be sure to apply a new layer of sealant to protect the repaired area. By following these best practices for caring for your acrylic pour paintings, you can ensure that your stunning artworks will continue to be enjoyed for years to come.
Conclusion: Embracing the Creativity of Acrylic Pouring
Acrylic pouring is a captivating and rewarding art form that allows you to unleash your creativity and explore the beauty of fluid art. Whether you’re a beginner or an experienced artist, the techniques and methods covered in this guide can help you create stunning, one-of-a-kind paintings that showcase your unique style and vision.
As you’ve learned, acrylic pouring is a versatile technique that allows you to experiment with color, texture, and movement. From the basic pour to more advanced methods like the flip cup and swipe techniques, the possibilities for creating captivating acrylic paintings are endless.
Remember, the key to success in acrylic pouring is to embrace the process and not be afraid to make mistakes. Each pour is an opportunity to learn and grow as an artist, and the unique results you achieve will be a reflection of your own creative vision.
